StayLinked clients each have an installation guide that describes the client options specific to the manufacturer, model and device operating system. In addition to the PDF guide available for download, each client ZIP file includes an install.txt with basic instructions. Typical installations operate through a Windows PC using Microsoft ActiveSync or Windows Mobile Device Center.
Devices that have another emulation product installed should have the other emulators disabled or removed. Attempting to run multiple emulators on a device can result in issues with the scanner, radio and/or keyboard operation.
ActiveSync and Windows Mobile Device Center
Most devices can automatically start a partnership or connection to your PC. Some devices require a driver provided by the device manufacturer. If you are unable to get the device to communicate with your PC, we recommend using the manual installation instructions to install the client. If your Windows 10 PC can no longer use Windows Mobile Device Center, see the technical note in the same section below for suggestions on re-enabling the product within Windows.
Third party programs that set a device restore point can interfere with StayLinked features. Clients request their sessions by asking for the session number in the session.ini configuration file. Any program other than the StayLinked client that make changes or replaces client files with a ‘restore point’ or ‘known good’ copy can break the client’s ability to recover an active session. If you plan to use any of these programs, be sure they are configured for registry only or that they exclude the StayLinked directories.
Testing Scanner Configuration
Most StayLinked clients can natively communicate with and enable the scanner. Some devices, (typically those without integrated scanners) will need to be configured for scanner-as-wedge. You can test your scanner by scanning something into the Client scan test. If no data appears, refer to the Scan Configuration Guide among our technical articles on this site. Without proper scanner configuration, barcode transactions will be processed as high-speed typing, using individual transactions for each character. This can result in lost data and excessive beeping by the device. Scanning into the keyboard test will display keyboard transactions for improperly configured scanners.
Scanning is controlled on three levels. The scan engine must be able to read a barcode. The StayLinked client will display barcodes received from the operating systems in the scan or keyboard tests, and the StayLinked server can make adjustments to incoming barcode data. Adjustments to the scan engine must be made on the device. Some devices provide control panel applets to adjust the scan engine, while others may require a supplemental configuration file if the manufacturer does not provide scanner control.
Adding Keyboard Maps
During a connection, each device communicates a device type to the StayLinked server. New device types that need a keyboard map will report an error Esp0003, No VT/5250/3270 keyboard map found for device devicetype.
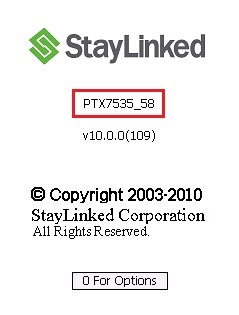
The Device Type for each client will be displayed in the connections list and on the splash screen next to the client version. Device Types are a combination manufacturer model, operating system and keyboard layout as reported by the device operating system.
You can add new keyboard maps manually from the Emulation Settings > Keyboard Maps section of the Administrator or from the Connections List by double clicking a device that has the error message in the session status column.

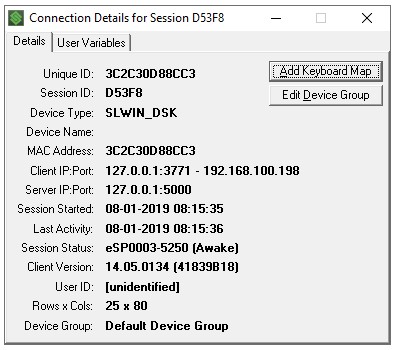
While your device displays the Esp0003 error message, you can quickly add the keyboard map by opening the details display in the Administrator’s Connections List. Just double-click on the connection and select the ‘Add Keyboard Map’ option.
Only one keyboard map must be installed for all devices of the same device type. Every device type must have a matching keyboard map installed on the Server for the required emulation type.
If you do not see an available keyboard map that matches your device model, you may need to download and install the ‘Administrator Keyboard Definition Update’ or install and copy a keyboard of a similar device to the exact device type displayed on your client splash screen. Copied keyboards will work best when you use an original map that is from the same manufacturer and use the closest operating system and keyboard layout possible. Additional details on StayLinked keyboard mapping can be found in the Technical Reference article for Keyboard Maps.
Instructional Video – Add a Keyboard Map
Set Client Screen Size
While emulation sessions typically operate in 24 rows by 80 columns, most mobile devices can’t easily display this on a smaller screen. This means you’ll need to know how much of that space is actually used by your hosted application, and if that screen information is displayed in the upper-left corner of the emulation space.
If you’re not sure, StayLinked includes several tools to help view the session. One of those options, called a ‘Session Screen Dump’ can be viewed by navigating a session to a desired screen and then selecting Connections > All Connections > select and right click on the desired session > select View > Session Screen Dump.
The first part is information specific to this device and session, followed by a layout of the emulation screen, and then a list of each hex or Unicode value displayed.
The screen display is organized in rows and columns:
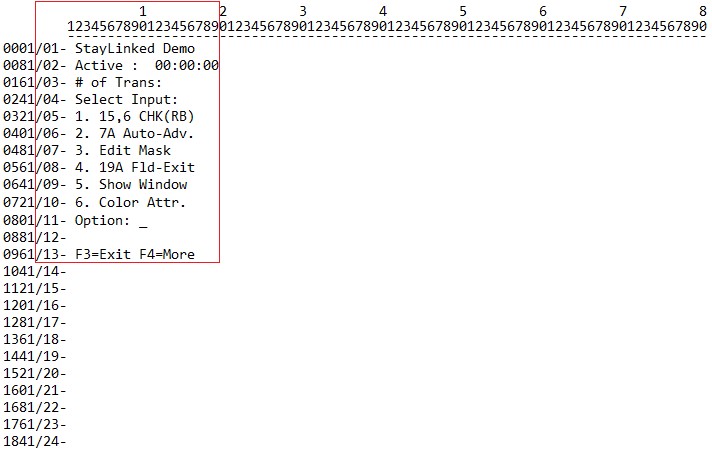
In this example, you can see that the host is painting characters as far as rows 13 and column 19. As long as the host stays consistent in this display size, the client could be configured to 13×19 allowing the text to be as large as possible without displaying large section of unused screen area.
Client screen size can be configured in the client configuration while it is disconnected from the server or using client settings features in the StayLinked Administrator.
Instructional Video – Client Screen Fixed Rows and Columns
Client Special Technical Notes
There are a few settings that may prevent troubleshooting efforts. We recommend that these settings are not enabled until the connectivity has been tested. Once connectivity to the server is established, Client Settings in the Administrator can standardize your configuration options.
| Setting | Option | Notes |
| Auto Connect | Never / Once / Always | The setting of 'Always' means that the client will 'always' reconnect. This can make it difficult to get disconnected to adjust settings or configure the device radio. Pressing the escape key during a handshake will bail out of the connection and get you back to the splash screen. If the device gets connected to the server, use the Administrator's connections list to 'disconnect' the device. |
| Full Screen Mode | On / Off | This setting will hide all task bars. This can prevent you from seeing the client menu options, radio icon and other informative items displayed on the Windows task bars. |
| Application Lockdown | None / Show / Hide | Application Lockdown requires a password to minimize or close the StayLinked Client. It also makes the device take the power settings from the Device Group in the Administrator. Using this setting to show or hide the system task bar is recommended only after the radio has been tested to operate as desired. |
Cellular Connections
Windows CE and Windows Mobile devices may have integrated cellular network cards. The following settings will need to be added to the staylink.ini file in order to access the cellular network with these device operating systems:
gprs_connect=1 enables GPRS mode in the StayLinked client
gprs_exclusive=1 use his connection exclusively
for the StayLinked client
The following settings may have an impact on the user experience over a cellular connection:
gprs_phone_enable=1 enable the PHONE interface if not enabled
sla_dm_keepalive=X set X to the number of 1/10th seconds for a keepalive 'ping'
connect_timeout=20 connection timeout (instead
of the standard 10 seconds)
If you wish to configure a StayLinked client to assume that a network connection is already in place, you can add the “Always in Range” setting. This can be added as a client setting (which doesn’t work if the device cannot reach the server), Scan2Configure barcode that would be scanned into the client scan test (which requires the scanner to be properly configured) or by adding an entry for always_in_range=1 to the client configuration file called staylink.ini.
Android and iOS devices do not require these settings to connect to your StayLinked server via cellular network.
Replication and Device Master Images
StayLinked client passes a special value called the ‘unique ID’ to the server during a connection. If the client detects the default value during startup, it is replaced by hardware values to make it a unique value. The server uses this value to uniquely identify each device. If you plan to make an image of the operating system or registry, it’s important that this value is reset before the image is created. This can be reset by pressing the reset UID value on the File > About client menu, or by creating a barcode in the Scan2Configure Administrator options. These features are described in the Session Persistence Guide, Client User Guide, and Administrator User Guide respectively. Once the UID has been reset, it will be redefined the next time the client is started.
Share the post "Windows Mobile / CE Client Installation"