
JavaScript injections can be used to increase the functionality of profiles. Injections are added into the device's web view at specific points in the page lifecycle.
Creating an Injection
Begin by creating or editing the package where the new profile will be located. Detailed instructions on creating and editing packages can be found in the "Creating and Managing Packages" article.
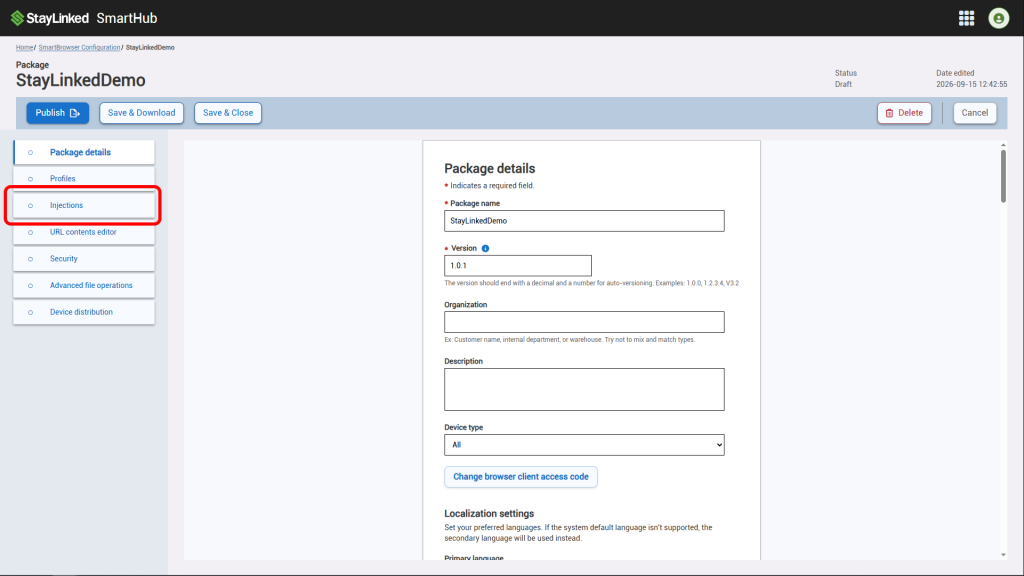
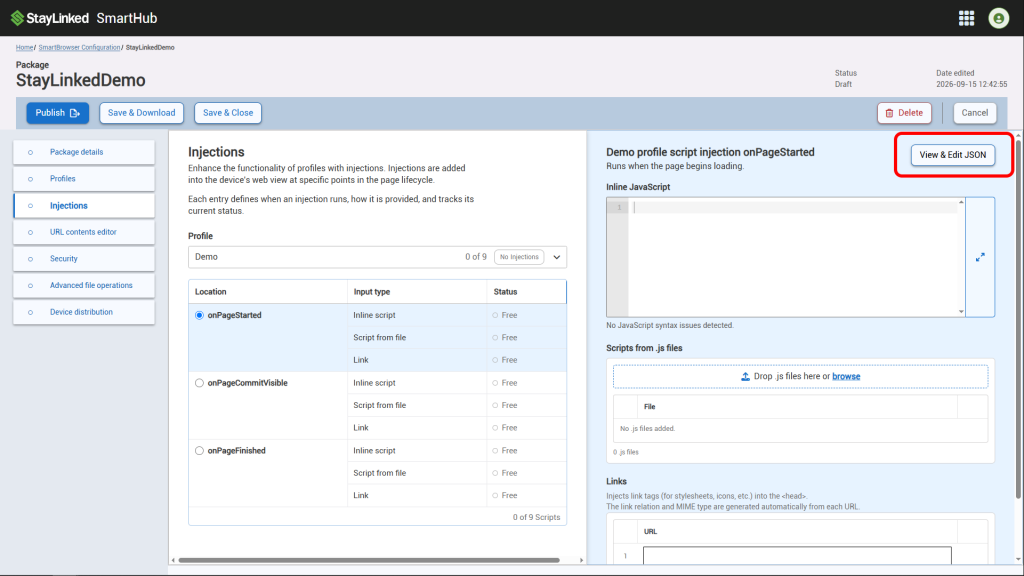
Once you are on the package editing screen, select the 'Injections' tab.
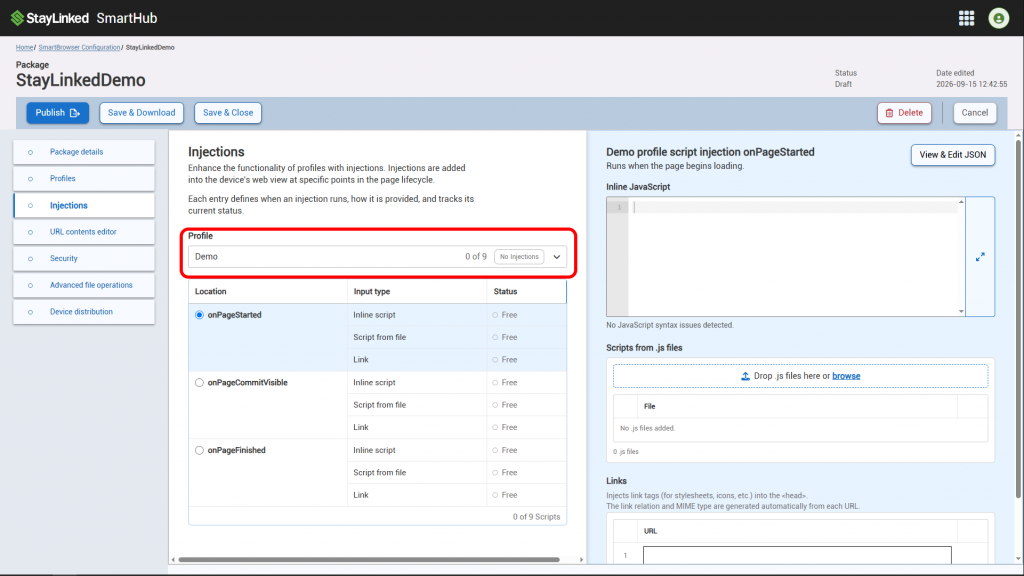
From here, select the profile where the injection will take place by selecting it from the 'Profile' dropdown menu.
Next, select the location where the injection will take place.
The options are onPageStarted, which runs when the page is being loaded; onPageCommitVisible, which runs when the page content first becomes visible; and onPageFinished, which runs when the page has finished loading.
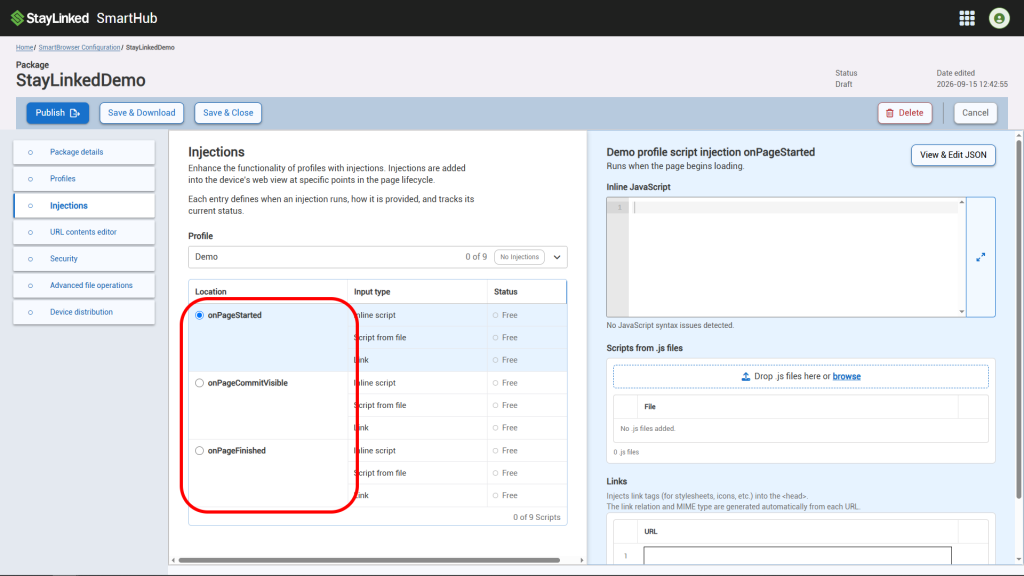
At this point, you are able to choose the input type. The supported input types are inline JavaScript, scripts from .js files, and links.
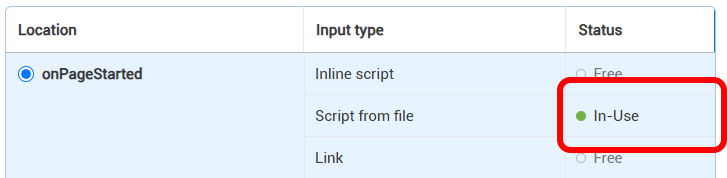
Once an injection has been added, the corresponding status section will display "In-Use".
Adding Inline JavaScript
To add an inline JavaScript injection, enter the JavaScript into the code block.
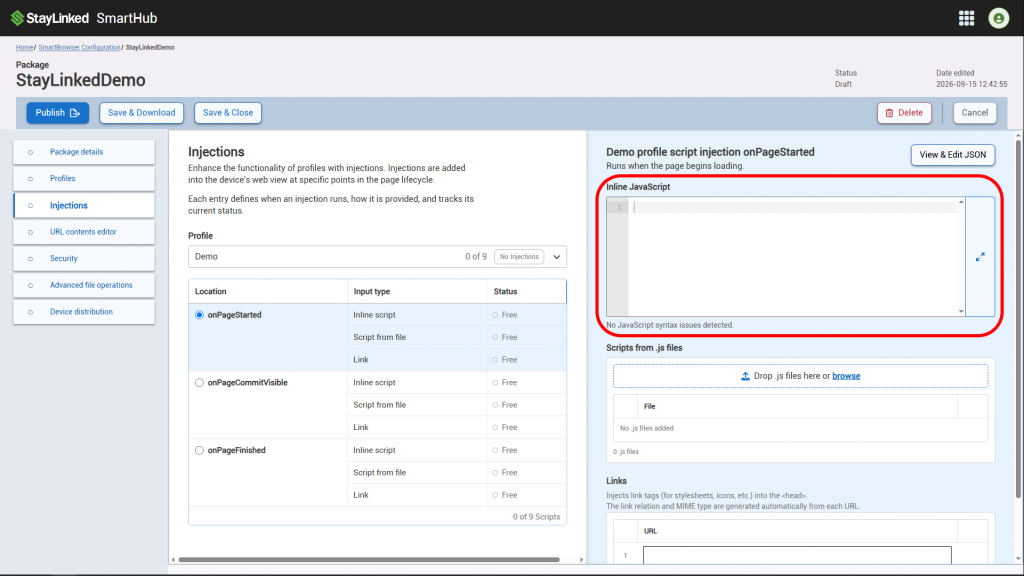
If any syntax errors are detected, they will be displayed below the code block. It is important to note that the code editor only checks for basic JSON syntax and does not debug the code entered.
Adding Scripts from .js files
To add scripts from a .js file, either drag and drop the .js file into the file drop zone or select the file drop zone and select the desired file.
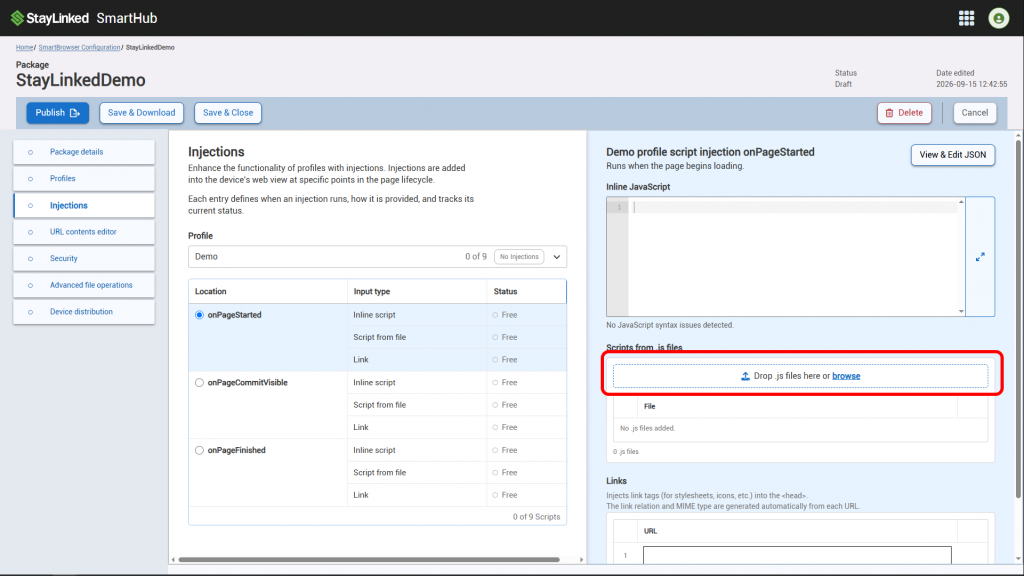
Once a file has been added, it will be displayed below the file drop zone.
Adding Link Tags
To inject link tags into the <head>, enter the desired URL into the text box.
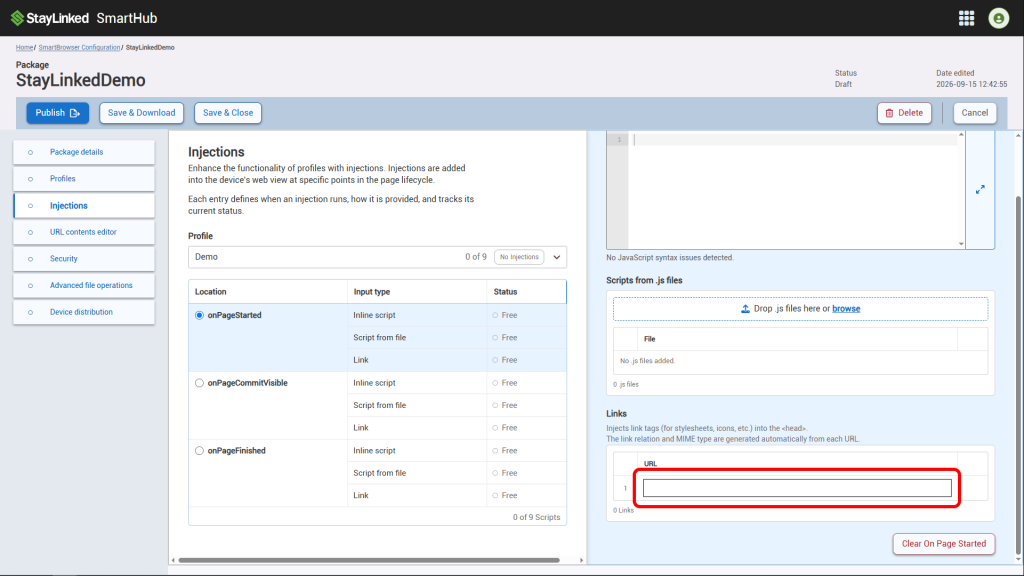
The link relation and MIME type are generated automatically from each URL.
Deleting an Injection
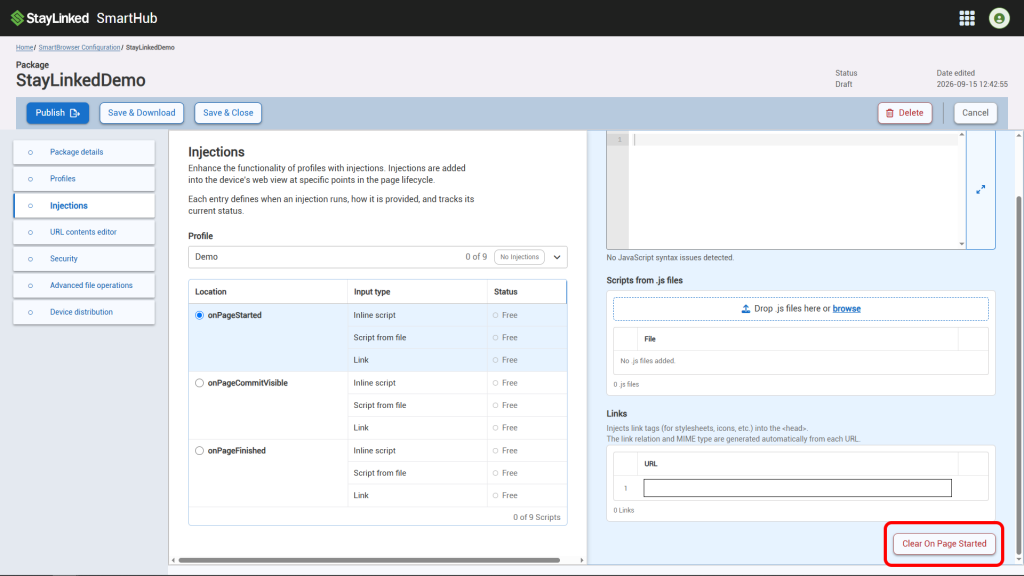
To clear all injections from a specific location, start by selecting the desired location.
Next, select the 'Clear On Page ___' button. The exact text of the button will vary depending on which location is selected.
Advanced JSON Editor
The advanced JSON editor displays all injections applied to the selected profile and allows the JSON to be edited directly. The editor also displays the JSON for the urlContentsEditor. Additional information about the URL contents editor can be found here.
To access the advanced JSON editor, select the 'View & Edit JSON' button in the top-right of the page.
Share the post "Creating and Managing Injections"