Administrative Access
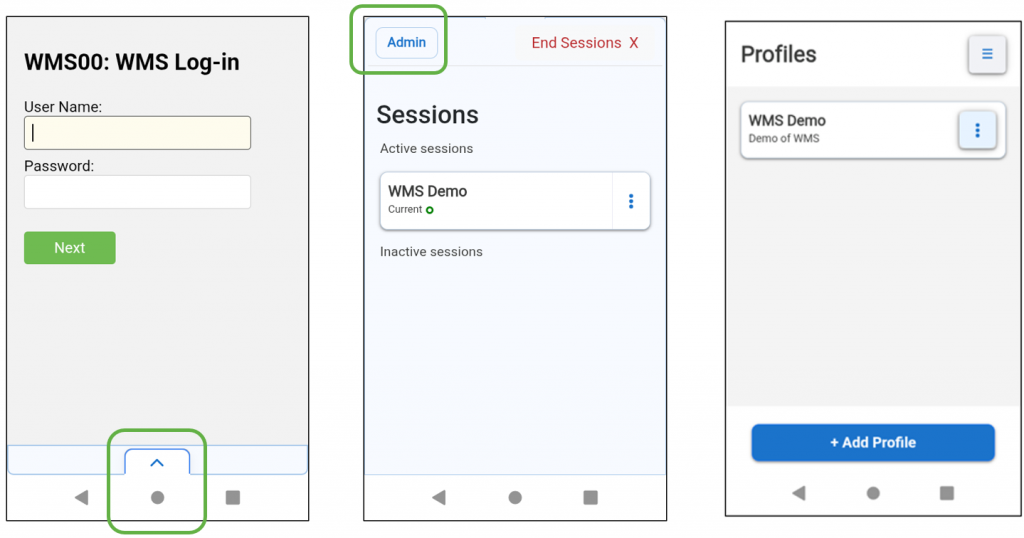
Modifying profiles and configuring browser functions and settings on the SmartBrowser client requires administrative access. Opening the drawer at the bottom of the screen by tapping the Up Arrow displays the 'Sessions' screen. Tapping the 'Admin' button prompts the user for the access code. The default access code is "esp" unless it has been updated. Entering the access code opens the 'Profiles' screen, confirming Administrative Access.
Profile Name, Description and URL
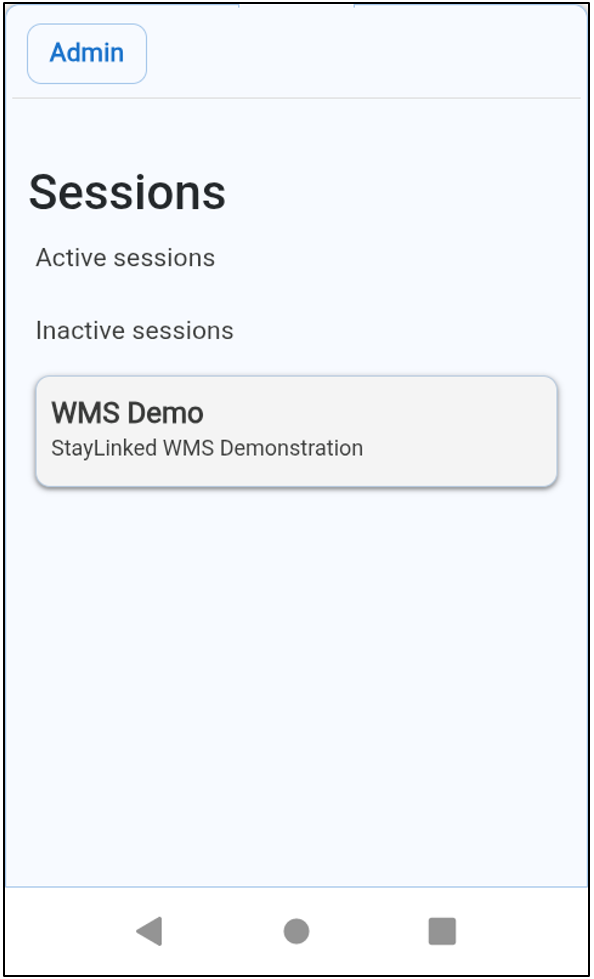
Each Profile requires a 'Profile Name' and a 'URL'. 'Description' is optional and appears below the 'Profile Name' in the 'Sessions' screen. In the example below, users see the 'Profile Name' of 'WMS Demo' and 'Description' is 'StayLinked WMS Demonstration'.
Default Profile
Setting a Profile to be the 'Default' Profile is achieved the same way in the SmartBrowser client and SmartServer. When editing a Profile, enabling the 'Default profile' slider designates it as the new Default Profile. The Profile configured as 'Default' always appears in blue color as the first Profile on the 'Profiles' screen of the SmartBrowser client with "(Default)" shown in the description.
Injection Configuration
Injections enable JavaScript to run at key points during the page load process to modify behavior, resolve issues, or improve compatibility.

onPageStarted: Triggered when the page begins loading. Common uses include injecting meta tags, clearing storage, or applying early patches for known issues
onPageCommitVisible: Triggered when content begins to render. Common uses include modifying the DOM, swapping styles, or applying device-specific adjustments before content becomes visible.
onPageFinished: Triggered when the page is fully loaded. Common uses include executing custom scripts, triggering analytics, or injecting enhancements that rely on the complete layout.
The injection of custom tags, scripts, or styles varies based on the specific environment and project objectives.
Please note that the editor checks for basic JSON syntax only and does not debug the code entered.
Once finished editing, tap the 'Export' button at the top right of the screen.
For assistance, a StayLinked representative is available to help.
Proxy Server
Proxy server settings are applied in the same way on the client and in SmartServer. Slide the toggle to the ON position to enable the feature, then input the appropriate Proxy IP Address and Port.
Export
Once a configuration file has been defined using the SmartBrowser Configuration Tool, tap the 'Export' button. The 'Date edited' information is updated.

The configuration file is saved to the download folder of the PC running the SmartBrowser Configuration Tool.
The configuration file is a ‘zip’ file. The filename begins with the company name, followed by the date (YYYMMDD) and after the dash, the time in 24 hour format (HHMMSS). There is no requirement to unzip the file.

Import
Device operating system versions dictate the visibility of certain directories.
Android 10 & below
For Android devices with OS versions of 10 or below, the configuration file can be deployed straight to the working directory of:
Internal Storage/Android/data/com.staylinked.smartbrowser/files/config
Android 11 & Above
On Android devices running version 11 or higher, configuration files cannot be deployed directly to the working directory due to scoped storage restrictions.
SmartBrowser can access the files within the following directories.
| Location | Comments |
| /sdcard/download | |
| /sdcard/download/StayLinked | |
| /enterprise/usr | For Zebra devices |
| /storage/IPSM/StayLinked | For Honeywell devices |
When SmartBrowser is launched, it automatically detects and imports any configuration files found in the specified locations. These files move to the working directory during import, and are subsequently deleted from their original location.
Share the post "Client Configuration"