For keyboard map common configuration and best practices, click HERE.
This section describes the methods provided to specify and tailor the keyboard maps used by the devices that connect to the server. Keyboard maps are used by the StayLinked system as a cross-reference between the many and varied device keyboards and the various host types (5250, 3270, VT, and TESS). With StayLinked, you can use the default keyboard map or alter it to suit the specific needs of your device users and their applications. In addition, you can create alternate keyboard maps to support variations needed for a specific host or group of devices.
Note that TESS keyboard maps are available only for selected Zebra device models.
Managing Keyboard Maps
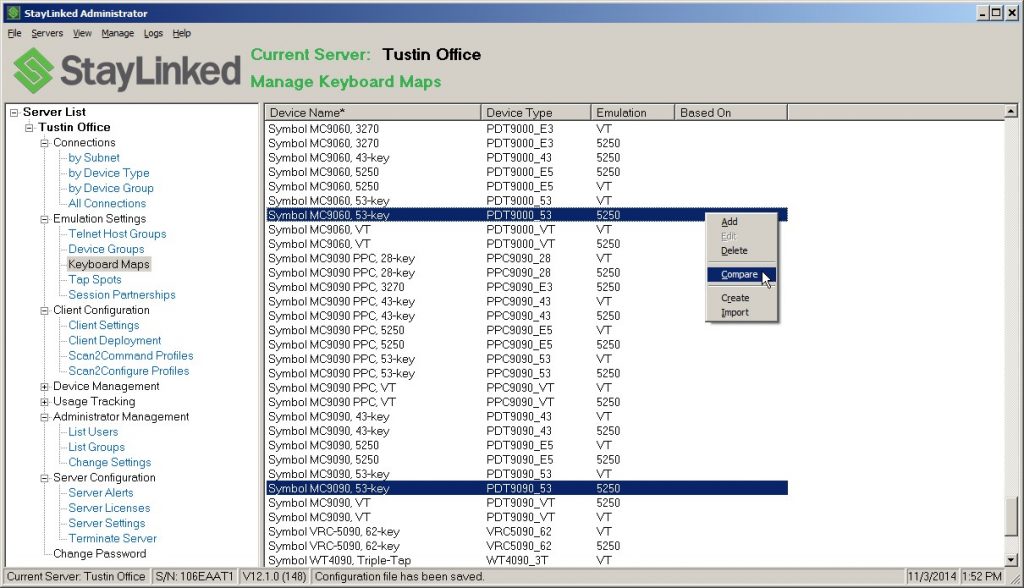
When you select Keyboard Maps from the server tree or the Manage menu, the Keyboard Maps list will appear in the main display panel, showing all the keyboard maps that are currently installed for the selected server and available for use by devices upon connection. Typically, this list should contain maps only for those devices that are in use at your installation. Other keyboard maps should be removed from this list as a security measure. The Keyboard Maps information can be sorted into ascending or descending order by clicking on any of the column headers. The currently sorted column will be indicated by an asterisk (*).
Only devices that have a keyboard map listed in this dialog will be able to connect to the StayLinked Server and run Telnet sessions.
Clicking the right mouse button on a keyboard map or in the blank area of the list will cause a small menu to appear with options to Add, Edit, Delete, Copy, Create or Import a keyboard map.
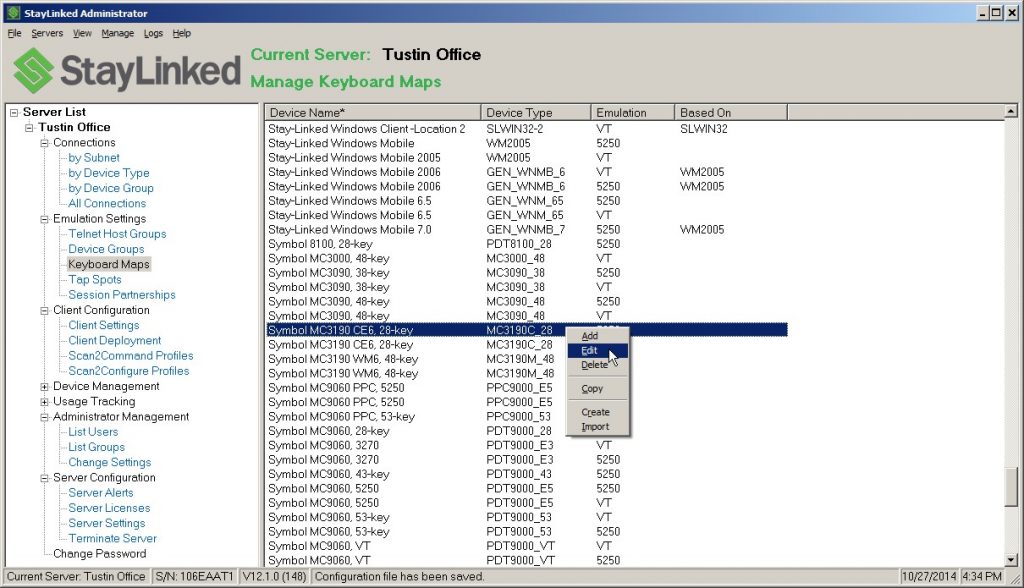
If you want to delete multiple keyboard maps from your server, you can multi-select keyboard maps in the list, right-click and select the ‘Delete’ menu option to perform a mass delete.
If you would like to compare two keyboard maps, then select exactly two entries in the list, right-click and select the ‘Compare’ menu option to display a keyboard compare dialog. You must select two keyboard maps for the same emulation type in order to perform a comparison.
Keyboard Map – Add – Select this menu option in order to add a new keyboard map based upon a pre-defined keyboard layout definition for a specific device.
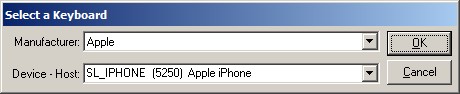
Select the Manufacturer and then the Device and Host type from the drop-down lists of pre-defined keyboard definitions. Once selected, click OK and you will be presented with the Keyboard Map Editor dialog (see below).
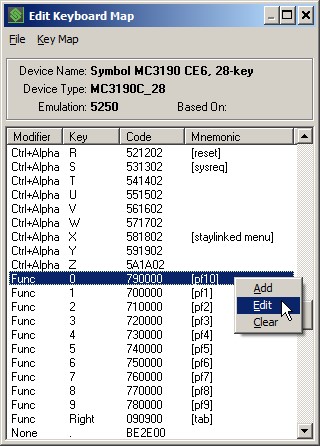
Keyboard Map – Edit – Select this menu option in order to modify the keyboard mappings for the selected keyboard map using the Keyboard Map Editor (see below).
Keyboard Map – Delete – Select this menu option in order to remove the selected keyboard maps from the list.
Keyboard Map – Copy – Select this menu option in order to copy the selected keyboard map to an alternate keyboard map.
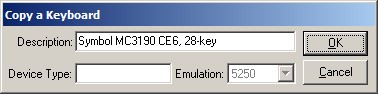
You can change the description and enter the device type that you wish to use for this copied keyboard map. The device type is the name you will use when referring to this keyboard map, and as such, must be unique in the list of keyboard maps for this StayLinked Server. This option is useful for creating alternate keyboard maps that can be assigned to Telnet Hosts and to Device Groups. Once entered, click OK and you will be presented with the Keyboard Map Editor dialog (see below).
Keyboard Map – Create – Select this menu option in order to create a new keyboard map from scratch.
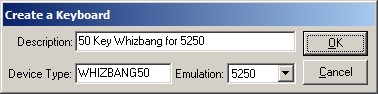
You must provide a description for this map and enter the device type that you wish to use for this copied keyboard map. The device type is the name you will use when referring to this keyboard map, and as such, must be unique in the list of keyboard maps for this StayLinked Server. Finally, select the emulation type for which this map will be used. This option is typically used to support devices for which there is no pre-defined keyboard map. If the device does not appear in the ‘Select a Keyboard’ dialog, then use this option to build a map from scratch. Once entered, click OK and you will be presented with the Keyboard Map Editor dialog (see below).
NOTE: Keyboard maps that are ‘created’ and are not based upon a pre-defined keyboard definition will only contain keys that you define. Whereas keyboard maps that are based upon keyboard definitions contain all possible key combinations that are reasonably available on the device, even if those keys have not been mapped to anything specific.
Keyboard Map – Import – Select this menu option in order to import a new keyboard map from an XML file that had been exported from the ‘Edit Keyboard Map’ dialog. See ‘Editing a Keyboard Map’ > File > Export Keyboard’ below for more details.
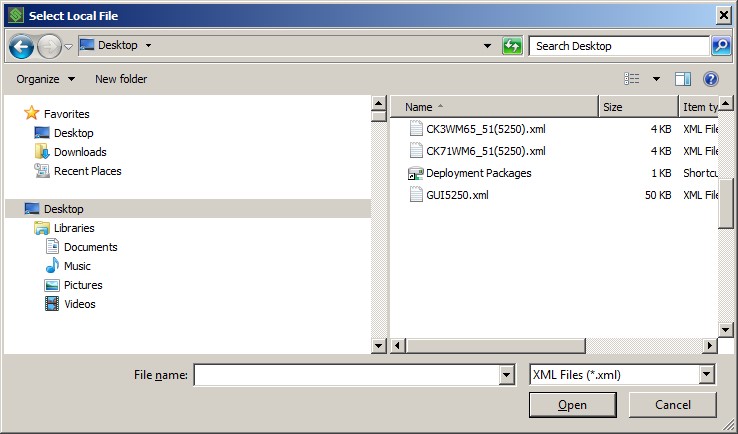
If the keyboard map that you are attempting to import already exists on this server, you will be prompted with an error message.
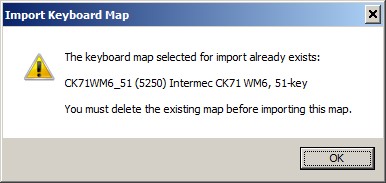
In this case, you must delete the existing map before you can import the new map.
Keyboard Map – Compare – Select this menu option while selecting exactly two keyboard maps for the same emulation type.
A dialog will be presented that will allow you to compare two keyboard maps and copy mappings between the two maps. When you exit the dialog, you will be prompted to save any changes made.
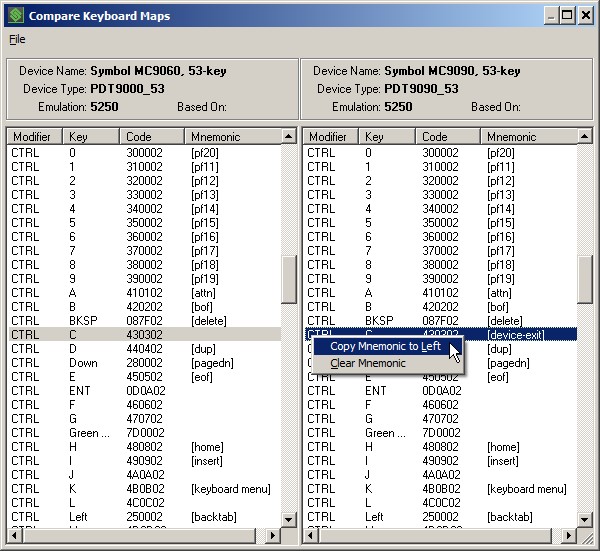
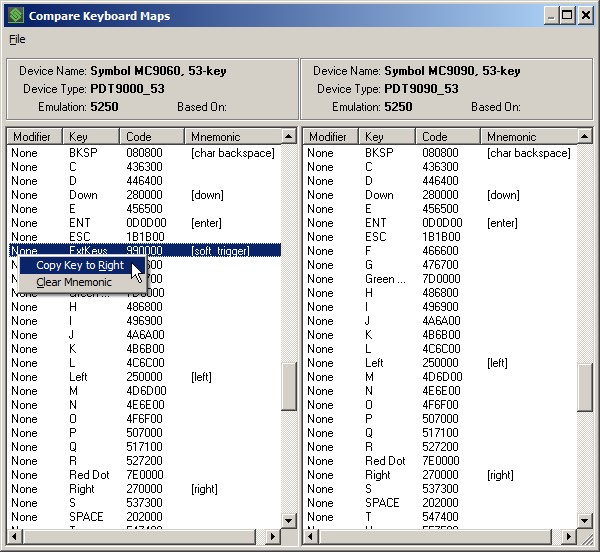
When you left click on a key entry in either list, an attempt will be made to locate a key entry with a matching key code in the other list. If a matching key code is found, that key entry in the other list will be selected and made visible. If a matching key code is not found, then no entry in the other list will be selected.
When you right-click on a key entry in either list, that key entry will be selected and the selected item in the other list will not be changed. Also, when you right-click on a key entry and there is a mnemonic entered for that key, a context menu will appear with options for manipulating the key mappings.
- Copy Mnemonic to Left/Right: Select this menu option to have the current mnemonic copied to the selected key entry in the other keyboard map.
- Copy Key to Left/Right: Select this menu option to copy the entire key entry to the other keyboard map. This option will only appear when the selected key code does not exist in the other keyboard map.
- Clear Mnemonic: Select this menu option to clear the mnemonic from the selected key entry.
Editing a Keyboard Map
Whether you choose to add, edit, copy, create or import a Keyboard Map, the following Keyboard Map Editor dialog will be used to map the model-specific RF device keys to emulation mnemonics, scripts, letters, text or combinations of these. You may right-click on a key map entry to bring up a Key Map context menu.
From the File Menu:
- Save Changes: Select this menu option to save the current keyboard mappings.
- Load Defaults: Select this menu option to load the default keyboard map for this Device Type and Emulation.
- Print Keyboard: Select this menu option to send a hard copy of the current keyboard map to the default printer.
- Export Keyboard: Select this menu option in order to export this keyboard map to an XML file. We recommend using the suggested export file name, but you can change it if needed. You can then import this map to a different StayLinked Server if desired. Any changes to the current keyboard map must be saved before you can export the keyboard map.
- Exit: Select this menu option to close this dialog.
- From the Key Map Menu (or right mouse click within the list):
- Add: Select this menu option to add a key map entry for a key code that is not defined in the keyboard definition.
- Edit: Select this menu option to update the selected key map entry.
- Clear: Select this menu option to clear/remove the mapping for the selected key. This option will only be available on keys that have a value in the ‘Mnemonic’ column.
Add Key Entry Dialog: Use this feature to add a key that generates a key code that is not already listed in the pre-defined keyboard definition for this device. This dialog will allow you to enter the new key code and to select the mnemonic, function or script you wish to associate with the selected key combination.
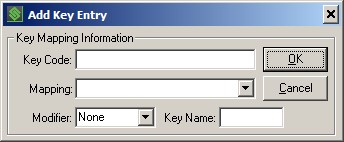
- Key Code: StayLinked Clients on DOS devices will have a ‘Keyboard Test’ option on the ‘Diagnostics’ menu. StayLinked Clients on PPC/CE/Android/iOS devices will have a ‘Key Test’ option on the ‘Tools’ menu. Use this test to determine what ‘Key Code’ is generated by the possible key combinations on the device. If this ‘Key Code’ is not listed in the pre-defined keyboard map, you can add the key to the map by entering the six-digit key code here.
- Mapping: You can select a mnemonic from the drop-down list, or type in the character, text or script that you wish to map to this key.
- Modifier: For reference only, select from the list, or type in, the most appropriate modifier based on the key combination you are mapping.
- Key Name: For reference only, enter the name of the key you are mapping (i.e., A).
Update Key Entry Dialog: Use this dialog to select the mnemonic or function you wish to associate with the selected key combination.
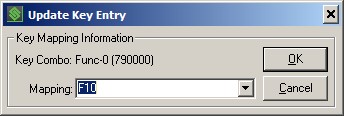
- Mapping: You can select a mnemonic from the drop-down list, or type in the character or text that you wish to map to this key.
Additional information can be located in our Managing Tap Spot article.
Share the post "Administrator User Guide – Managing Keyboard Maps"