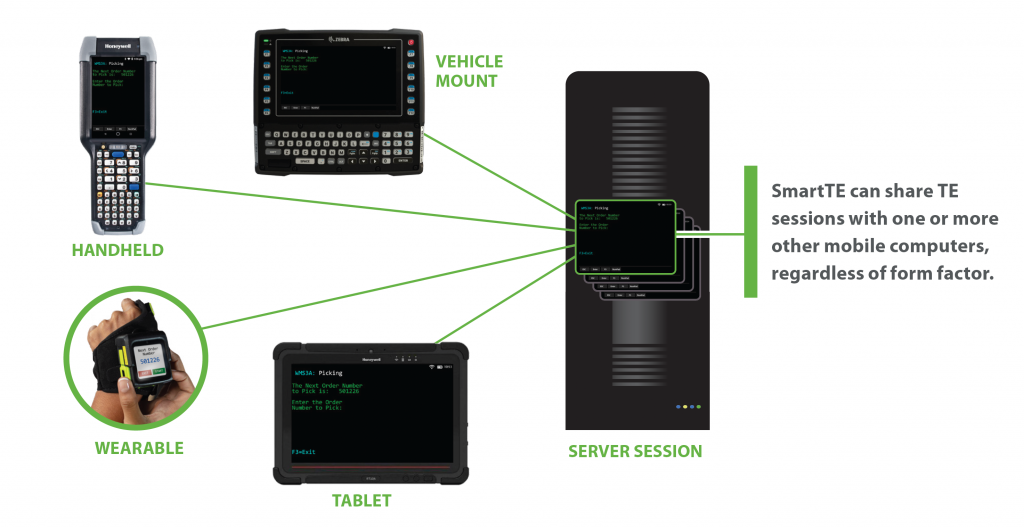
In this example, we will leverage features within Evolve to display a barcode on the Primary device for our Peripheral device to scan to pair the TE sessions. StayLinked supports a variety of methods in order to pair TE sessions across multiple devices.
This can be accomplished using a devices’ IP address, MAC address or StayLinked Session ID. With DHCP in use, the IP addresses can change even during a worker’s shift depending on the DHCP server’s settings, which would eventually require re-pairing the devices.
MAC addresses can be used for pairing, but Android 11 and later devices do not report their MAC addresses to applications for security reasons.
Therefore, the most robust way to pair a TE session across two devices is leveraging the StayLinked Session ID. With StayLinked, the TE sessions are maintained at the server regardless of anything happening with the mobile device IP addresses, device resets, etc. For this important reason, we will focus on using the StayLinked Session ID for pairing in this example.
Step 1: Create Host Group for Peripheral devices
In the Administrator under “Telnet Host Groups” create a Host Group and give it any name. For this demo we named it “Partner”. Any Peripheral devices we define will point to this Host Group.
All other devices in this example will be considered “Primary” devices, which will point to the Default Host Group.
Right click in the white area of the new Host Group and add a new host. We are naming this new host “Partner_Session”.
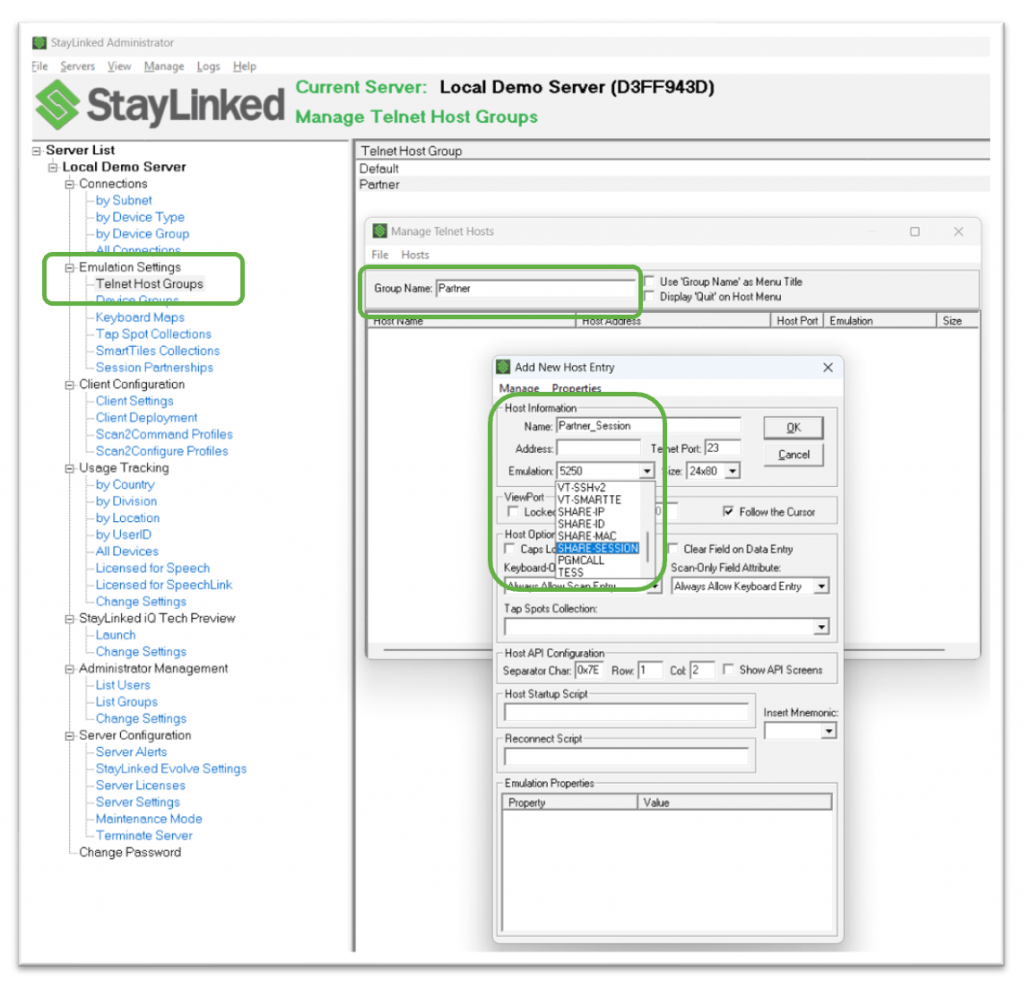
SmartTip! Adding the suffix “_Session” to the host name gives us an indicator within the host name of the type of sharing in use.
Open the Emulation pull-down menu and choose “SHARE-SESSION”. This setting defines this host as the one for Peripheral devices that will share sessions using the Session ID of a Primary device.
Hit “OK” in the “Add New Host Entry” window, and click “File – Save Changes” as you leave the “Add Host Group” section.
Step 2: Display Pairing Barcode on Primary Device
This API will command a Primary device to display its Session ID in the form of a barcode for the purposes of pairing the TE session with a Peripheral device.
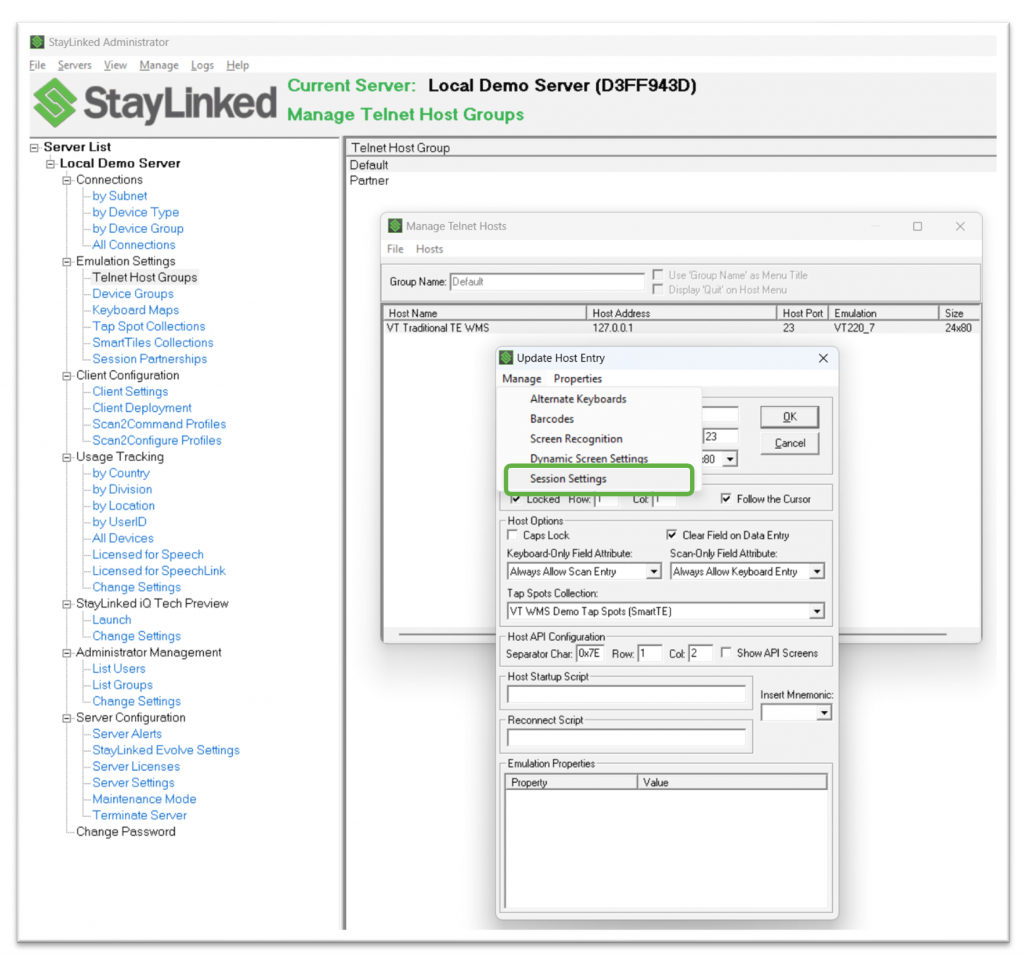
In your Host Entry, click “Manage – Session Settings”.
Within “Session Settings” click the “Global API’s” tab. Right click in the white area and choose “Add Evolve Display API” from the dropdown menu.
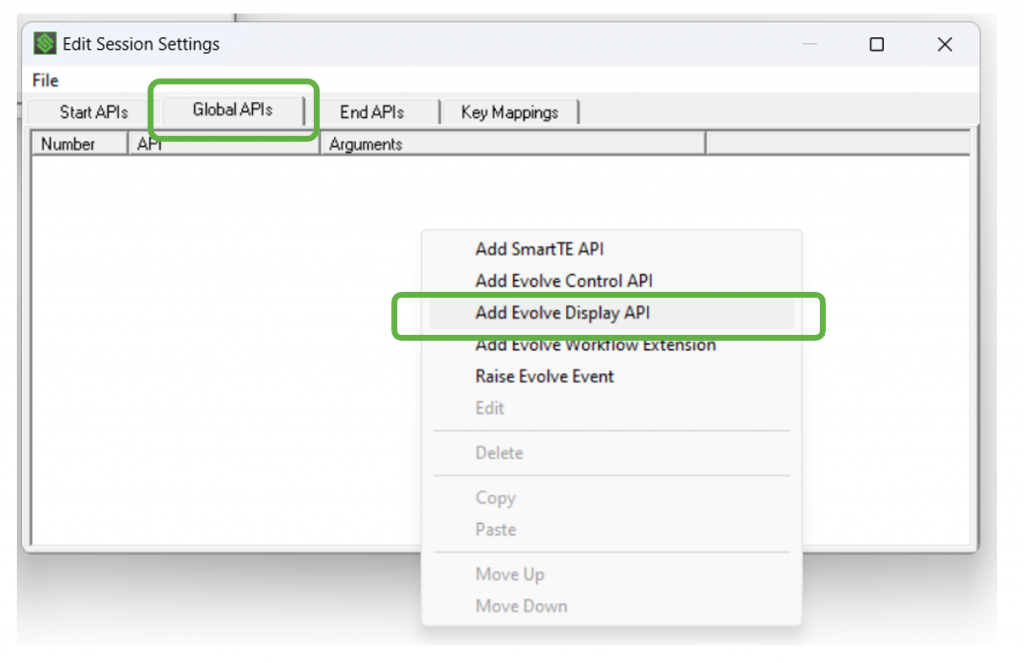
SmartTip! We will be assigning a number that we will use to call this Global API later. This screen will display any API’s that are already defined. You want to record the numbers of any global API's that is already in use for when we assign the API number in the next step. In this case, the blank white area shows no existing Global API’s are in use.
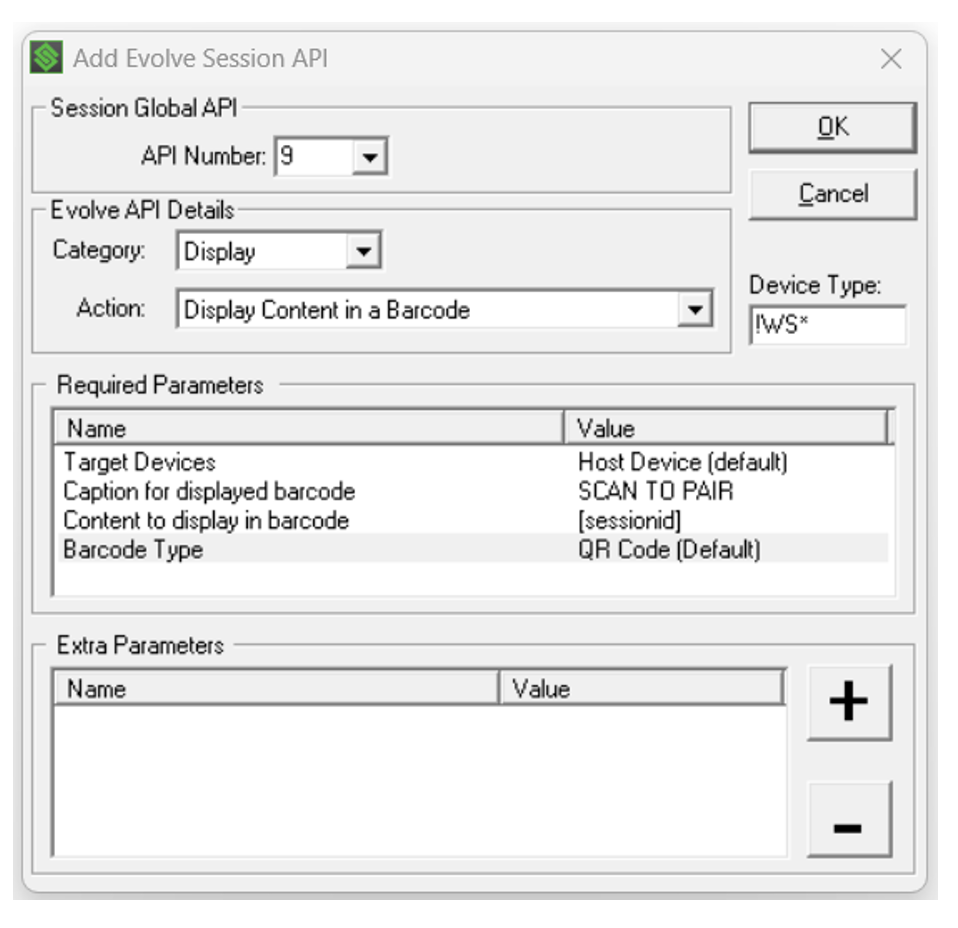
From the “API Number” drop down menu, choose a number for this global API that we will reference. You can enter any value that is not already in use from 1 to 999. For this example, we will choose “9”.

The API “Category” defaults to “Display”. This is the category we want in order to display content in a barcode.
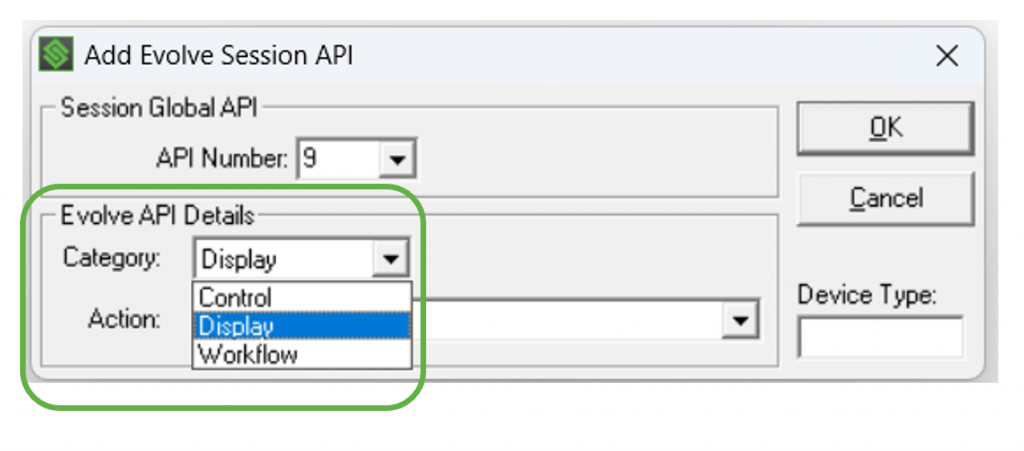
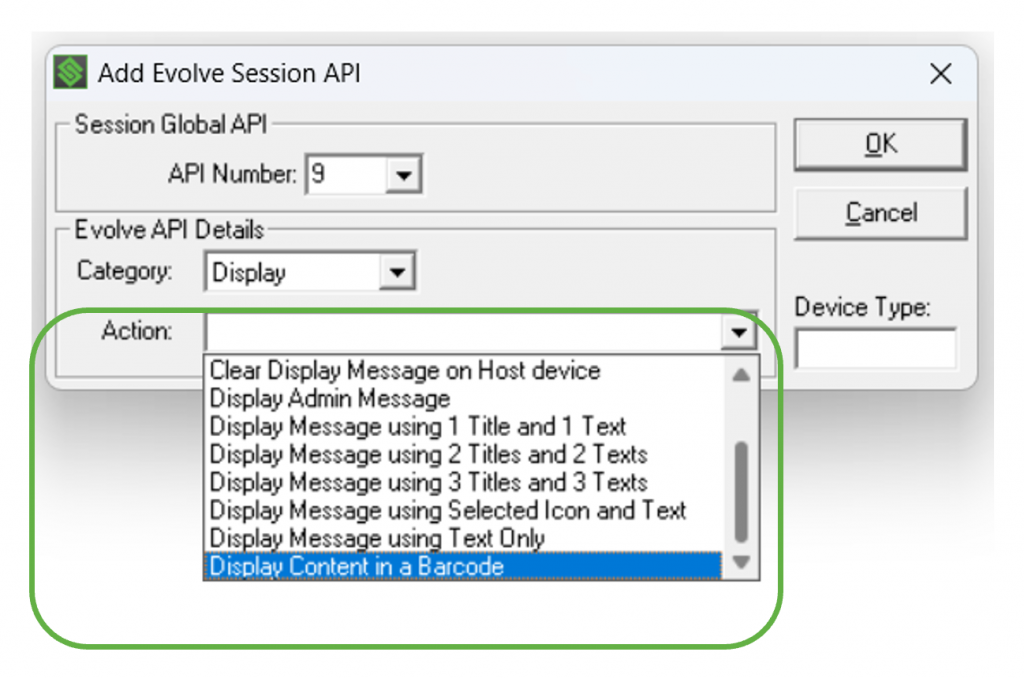
From the “Action” drop-down menu, choose “Display Content in a Barcode”.
For “Device Type:” we will define which devices out of our defined “Device Groups” we want to function as Primary devices (forklift computers, hand-helds) for our Peripheral devices (wearables).
For this example, let’s assume we have a range of different Primary devices and we want to pair WS50 wearables as Peripheral devices.
Since we know that the WS50 in this scenario will always behave as a Peripheral device, we can tell the StayLinked server to allow any device other than a WS50 within our Device Groups to display this barcode for pairing.
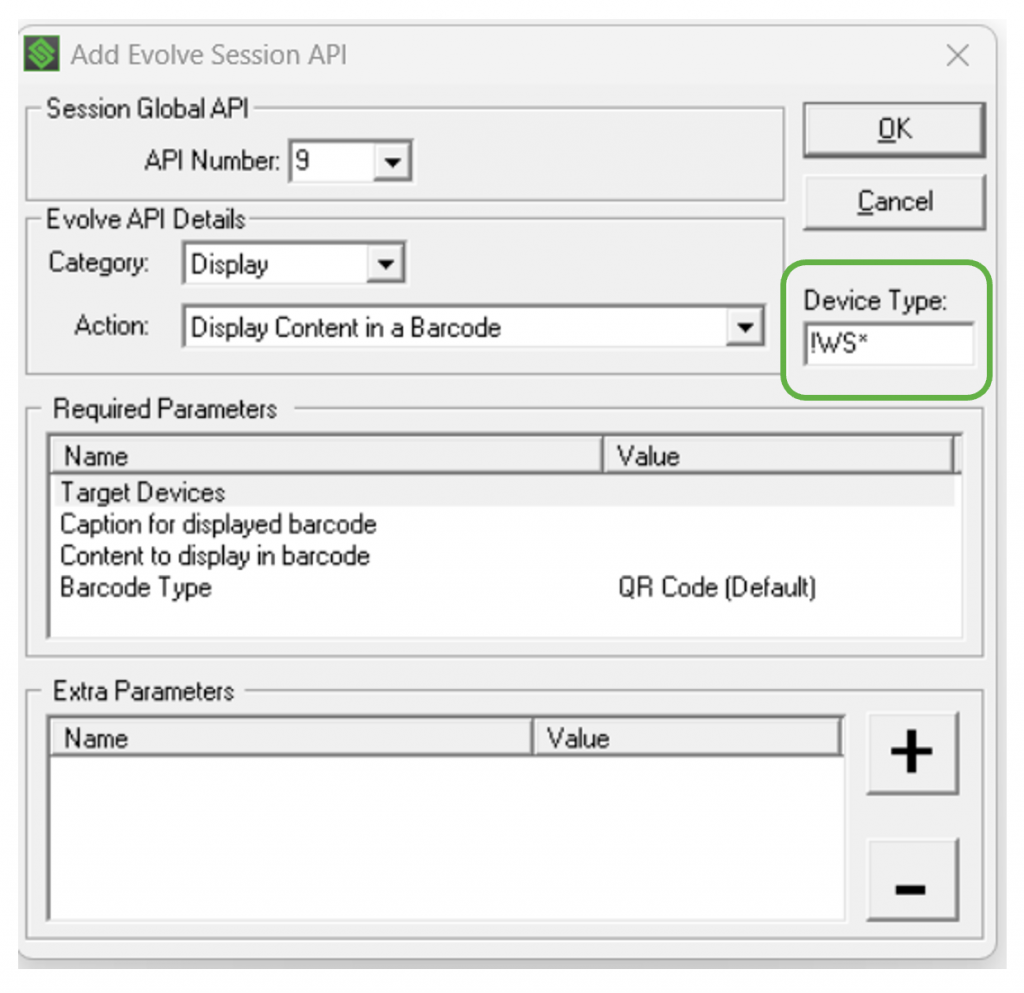
In this case we have entered “!WS*”. The “!” is a wildcard indicating ANYTHING OTHER THAN what follows will apply to this setting. Therefore “!WS*” would represent any device that does NOT start with “WS” will be capable of displaying a pairing barcode when prompted to.
We will now define:
- Devices this setting applies to
- Caption for the displayed barcode
- Content that the barcode represents
- Barcode type to be displayed
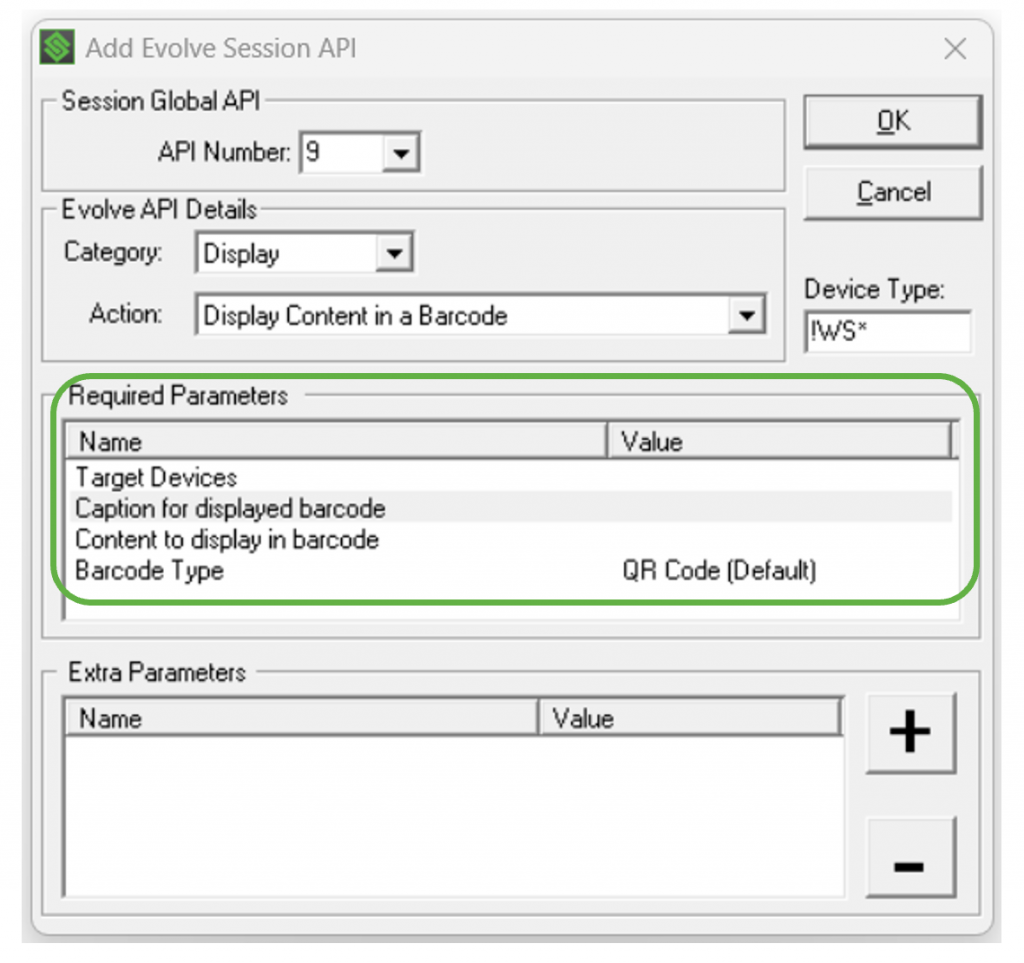
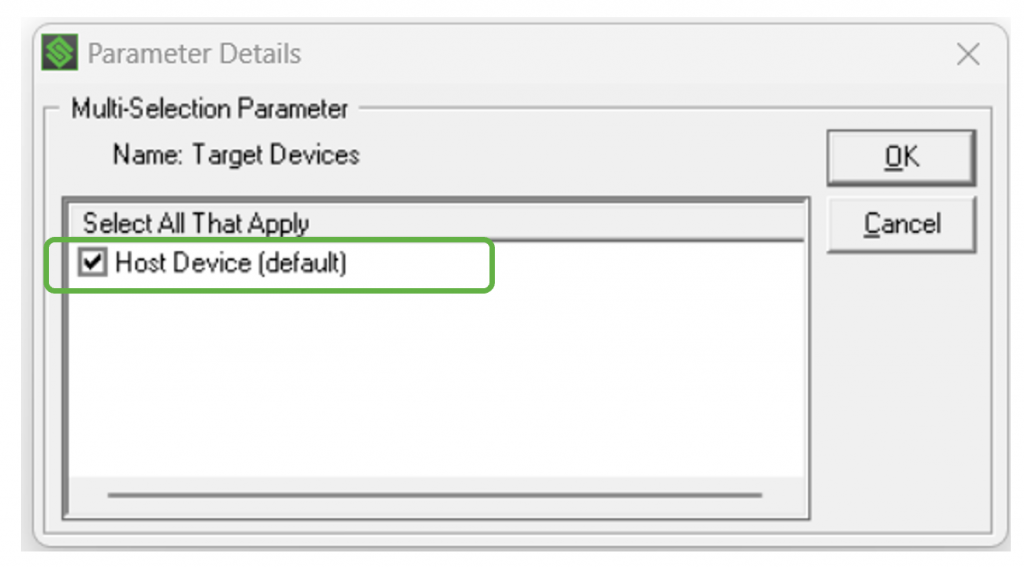
Double click “Target Devices” and ensure the box is checked for “Host Device”.
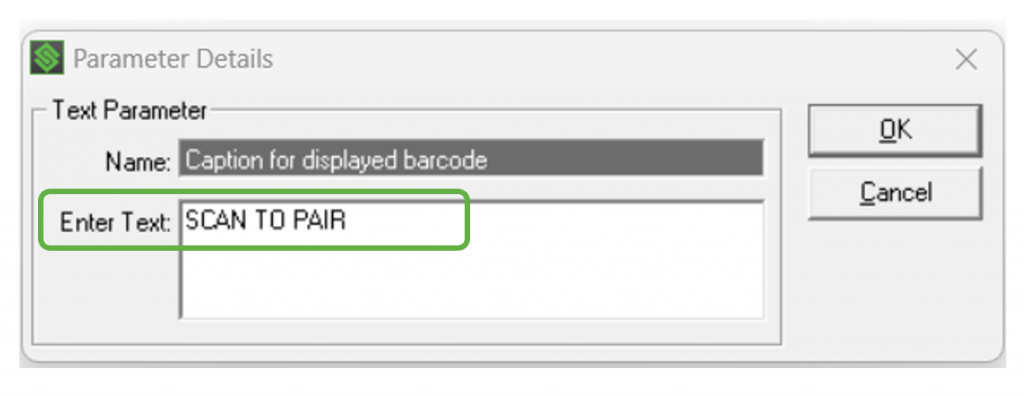
Double click “Caption for displayed barcode” and enter the text to appear above the barcode when it is displayed to the user. For this example we have used “SCAN TO PAIR”.
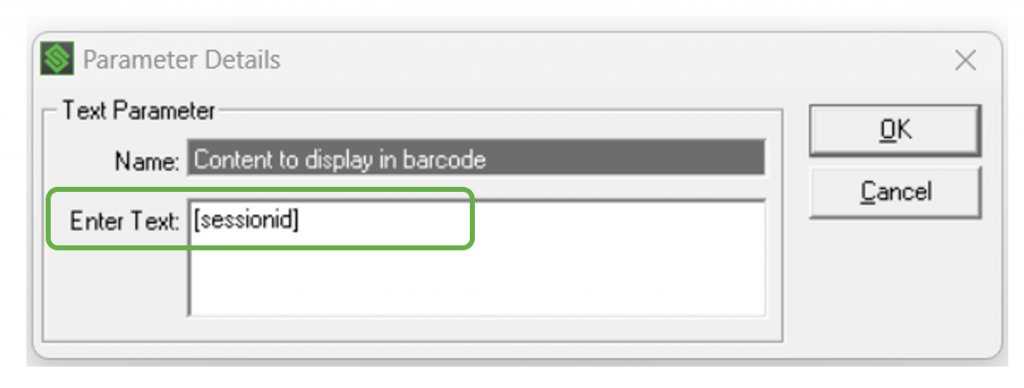
Double click “Content to display in barcode” and enter [sessionid]. This mnemonic will identify the StayLinked Session ID in use by the current Session.
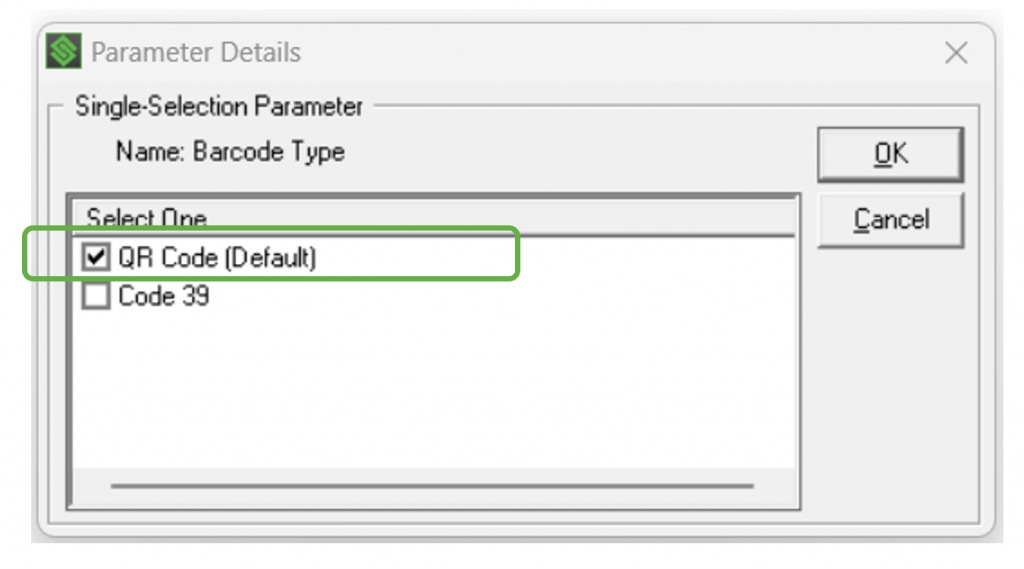
Double click “Barcode Type” and ensure the box is checked for “QR Code“. In this scenario we are using WS50 as the peripheral device that will scan this barcode, and they are all equipped with 2D imagers. In the case of a different peripheral device that is limited to a 1D laser or linear imager for barcode scanning, check “Code39” as the barcode type.
The final result should look like the image below. Push “OK” to save changes.
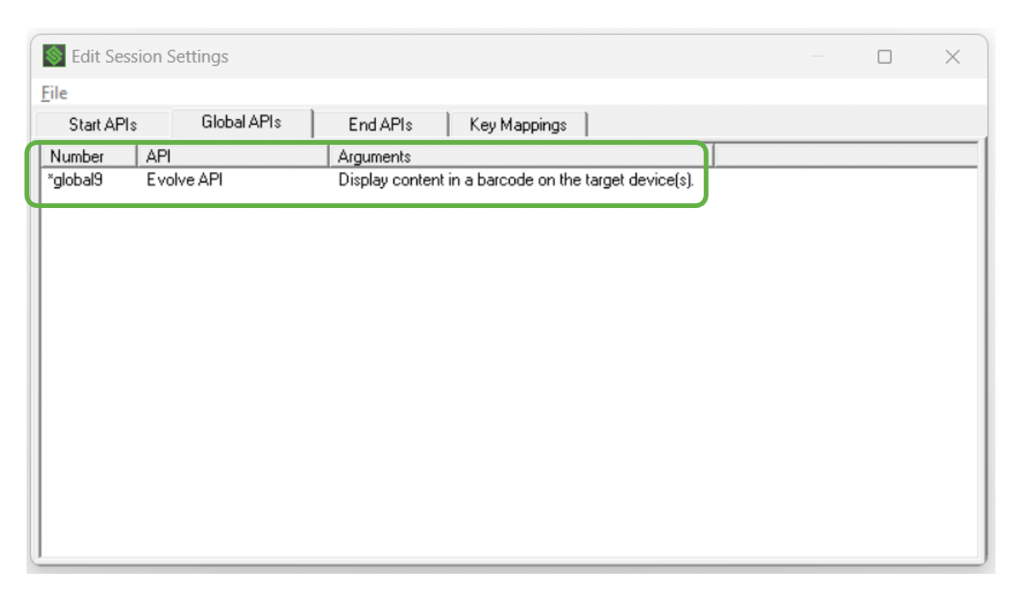
The “Global API” tab now displays our new entry.
From the File pulldown menu, select “Save All”.
Step 3: Define Peripheral Devices
In “Device Groups” right click in the white area and add a new device group. For this example we will use “WS50”.
Configure the IP address range for these units.

Define the Device Type. In this example we are using “WS50*”
Enter the name of the Host Group we want these units to point to. In this example we are using “Partner” to match the name of the Peripheral Host Group we defined earlier.
Check the box to “Auto Add Evolve Device Access”.
Press “OK”. Our Device Groups should now look like the image below.

Step 4: Add a Pairing Button
We need to include a button for the worker on the Primary Devices to display the pairing barcode when required.
Since we will be calling our Global API #9, we can put this button on multiple screens wherever it makes the most sense for the workflow. In this example, we want to enable session pairing from the RF Menu of the StayLinked WMS demo.
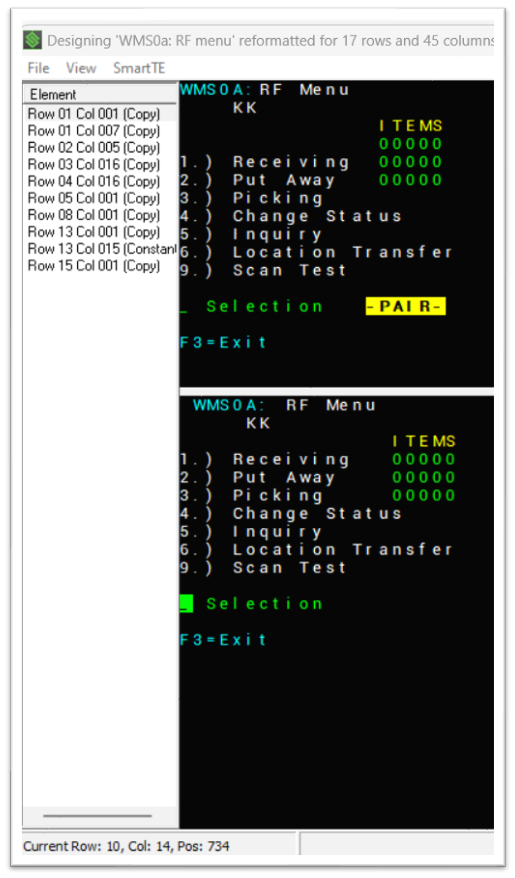
We have created a Designer screen that is a duplicate of the screen from the host and added a “-PAIR-” button.
This Designer screen will only appear on devices with 17 rows and 45 columns, matching the configuration of our VC80 Primary Devices. We can add more Designer screens with the “-PAIR-” button as necessary to cover a wider range of Primary Devices.
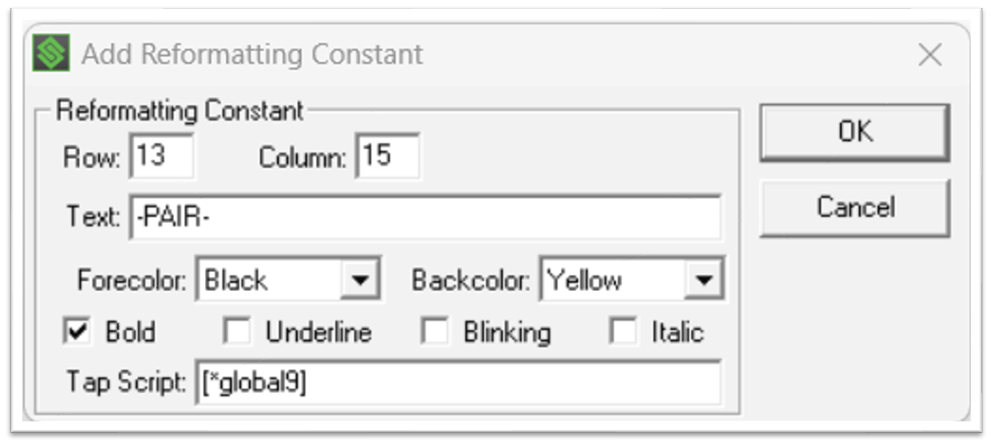
To create this button, right click where you want it to appear on the designer screen and choose “Add – Constant”.
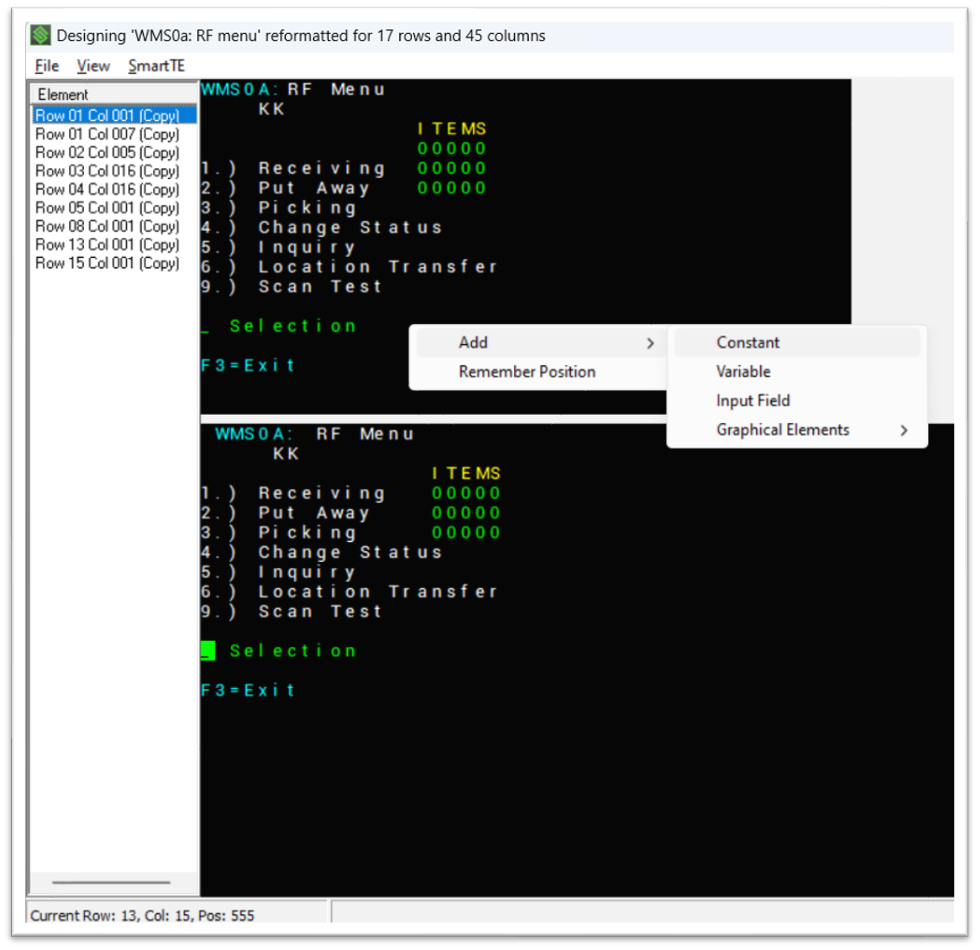
For this example, we have entered “-PAIR-” as our label, with a Bolded black font and yellow Backcolor.
We call our Global API using the Tap Script. In this example, we are calling Global API #9 using “[*global9]”.
Step 5: Scan To Pair The Session
On the Primary device navigate to the screen that includes the “-PAIR-” button that we created. In this example it is the StayLinked WMS RF Menu screen.
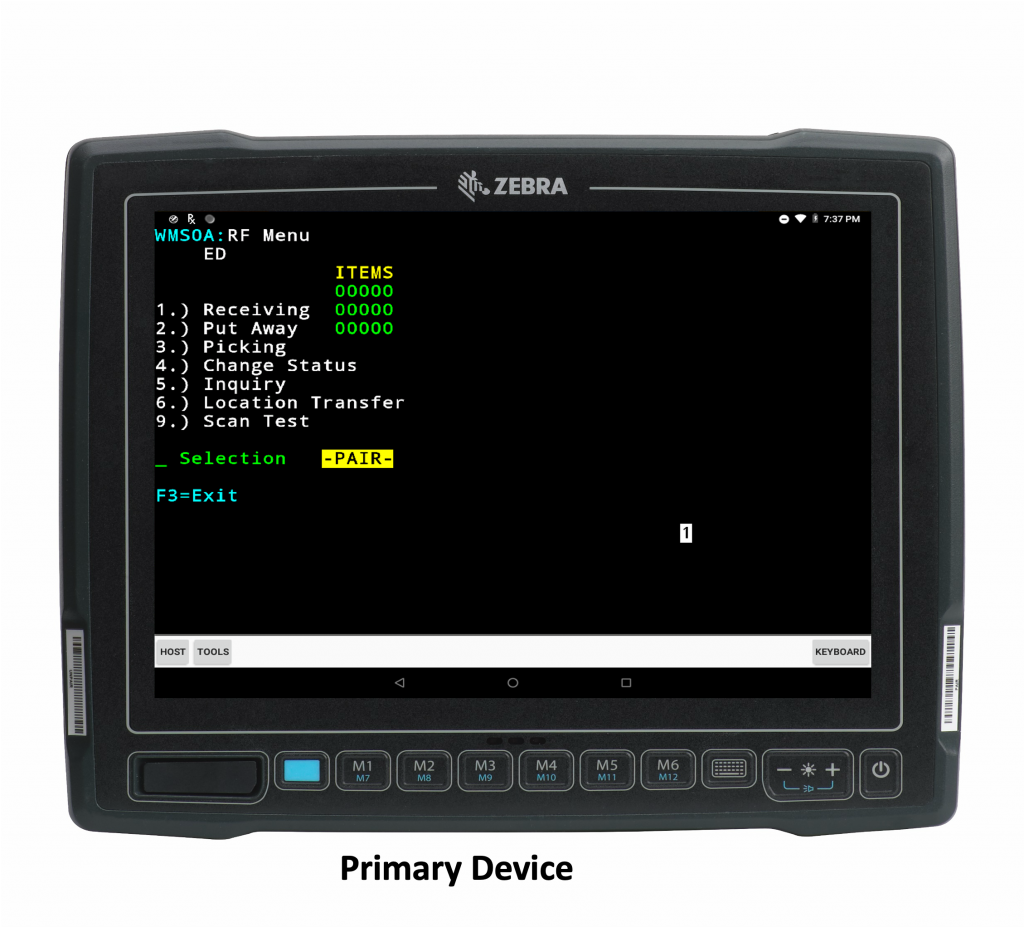
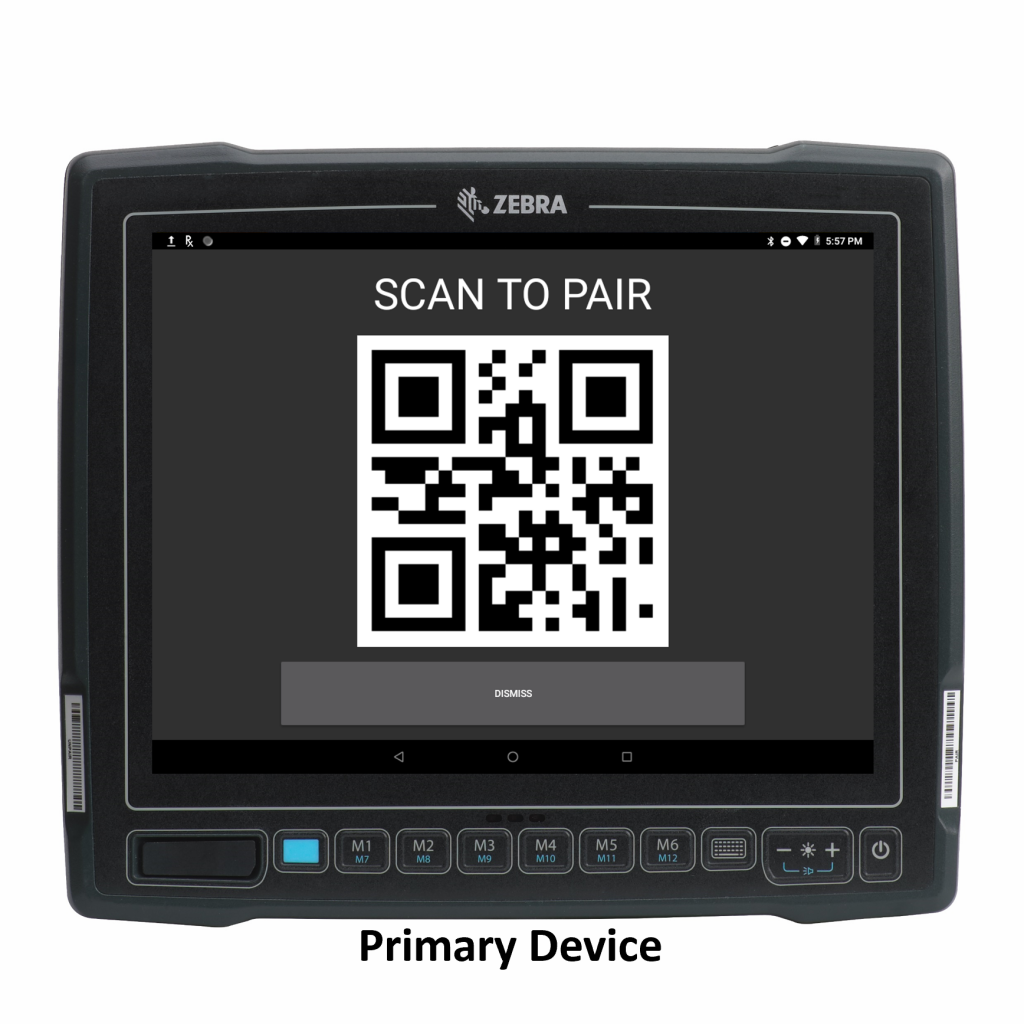
Press the “-PAIR-” button on the Primary device. This will call the Global API that we defined and display a barcode encoded with the device’s Session ID. Notice also that the Caption we defined (SCAN TO PAIR) appears above the barcode.
Connect to the Host from the Peripheral device, in this case the WS50. You will see a prompt to scan the sharing barcode. Any device that is pointed to the Partner Host Group will display this screen once connected.
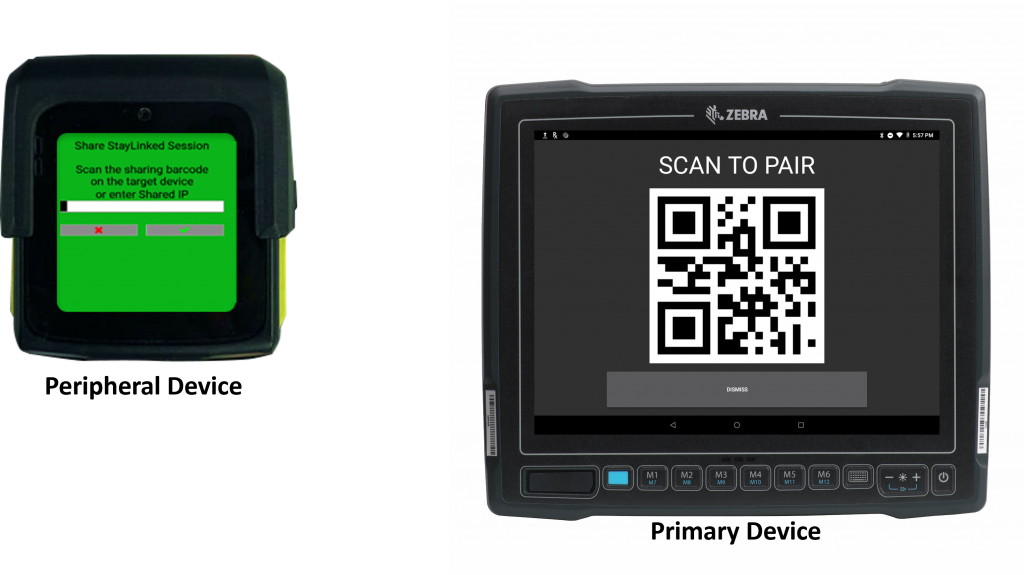
Scan the barcode on the Primary Device using the Peripheral Device, and the TE session should appear on the Peripheral Device screen. On the Primary Device, press the “DISMISS” button below the barcode and you should see the TE session. The TE Session is now paired across both devices.

Share the post "Session Pairing"