
Profiles point SmartBrowser to a specific web address and control how the SmartBrowser device behaves within this profile. This article will describe the various profile configuration options and their functions.
Profile Configuration
Profile name
Sets the display name for the profile shown in the SmartBrowser drawer and profile list.
Description
Sets optional notes about the profile. These notes are displayed under the profile name on the 'Profiles' screen in SmartBrowser.
URL
Sets the starting web address SmartBrowser opens for the profile. Be sure to include http:// or https://.
Default Profile
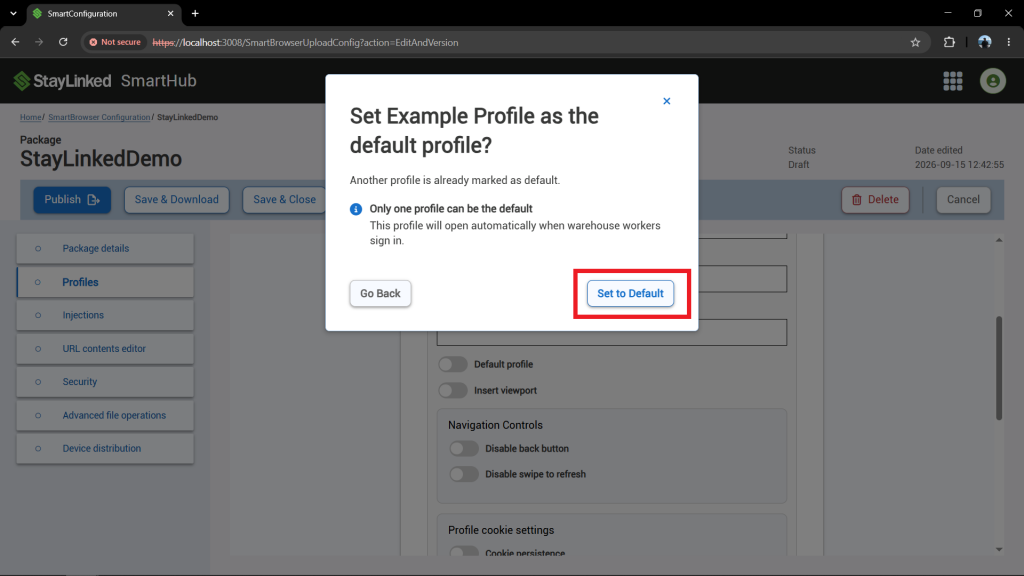
When enabled, the profile will automatically open when a warehouse worker starts SmartBrowser. Only one profile can be set as the default at any given time.
If another profile already has the setting enabled, a popup will appear asking if you would like to change the default profile. Select the 'Set to Default' button to set the current profile as the default profile.
Insert viewport
When enabled, SmartBrowser injects a mobile viewport meta tag so pages scale correctly on the device screen.
Navigation Controls
Disable back button
When enabled, prevents the browser back button from navigating to the previous page in this profile.
Disable swipe to refresh
When enabled, prevents pull-down swipe to refresh on pages in this profile.
Profile Cookie Settings
Cookie persistence
When enabled, a copy of login cookies is kept for this profile and restored when pages load. Enabling helps sessions survive brief WiFi drops. Disable when the site needs a completely fresh logon after logout, such as SAP.
Clear stored cookies with WebView cookies
When enabled, SmartBrowser's saved cookie copy is removed for this profile when cookies are cleared (logoff script, End All Sessions, or similar). Use with cookie persistence disabled for shared-device logoff.
Proxy Settings
Proxy server
When enabled, this profile's web traffic is routed through a proxy server instead of connecting directly. Enabling this setting activates the 'Proxy IP Address' and 'Proxy Port' fields.
Proxy IP Address
Sets the IP address or hostname of the proxy server for this profile.
Proxy Port
Sets the TCP port the proxy server listens on for this profile.
Custom Keyboard Settings
Set custom keyboards for profile
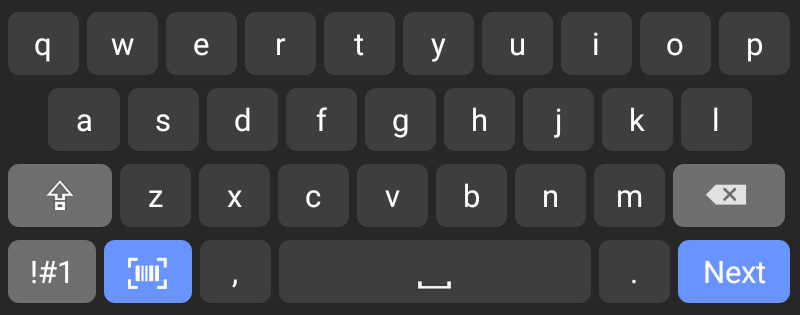
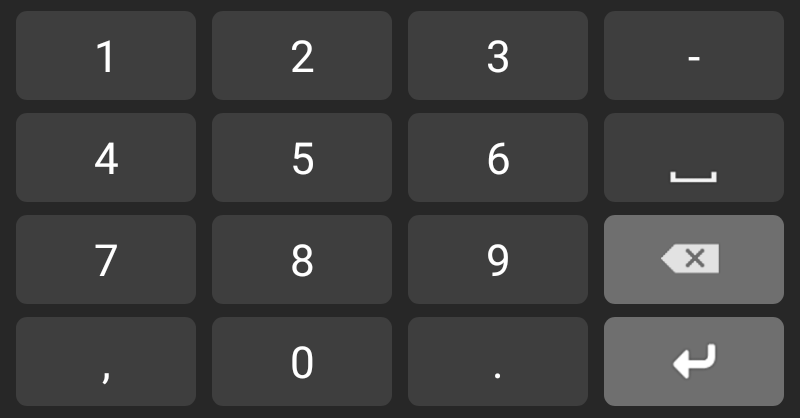
When enabled, the global keyboard settings are replaced by keyboards specific to this profile. Additional custom keyboard settings are displayed. The preset options for these keyboard layouts are QWERTY, numpad, email, function keys, symbol 1, and symbol 2. Screenshots of these keyboard layouts are included below.
QWERTY
Numpad
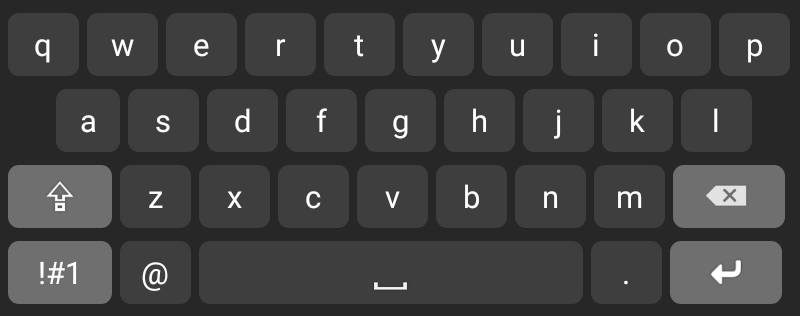
Function keys
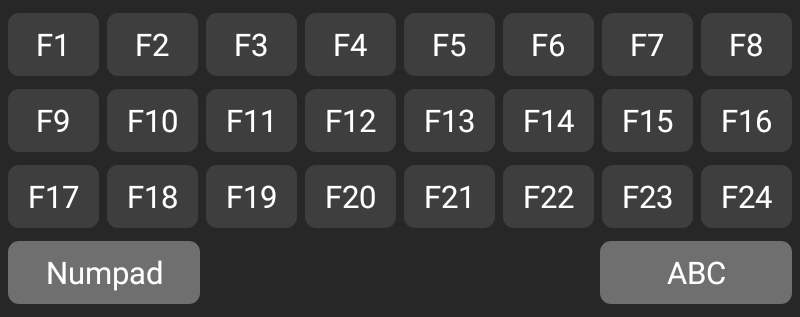
Symbol 1
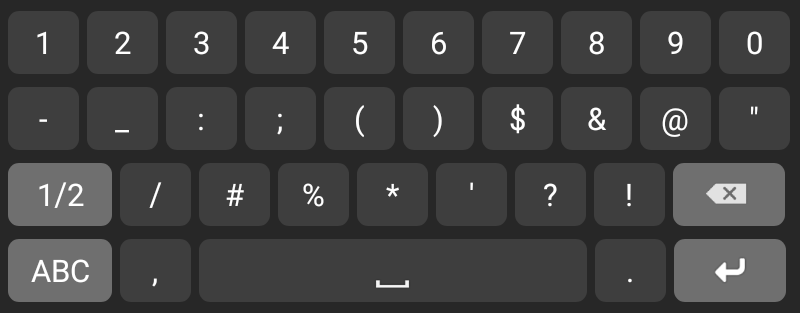
Symbol 2
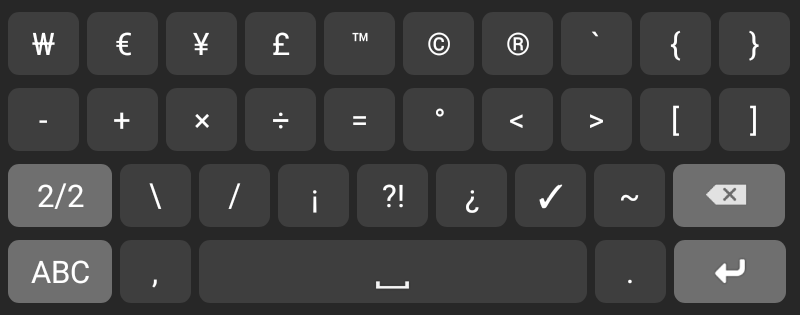
When not using a preset from the dropdown menu, select 'Other' from the dropdown menu, then enter the custom keyboard file name in the text field that appears to the right of the dropdown menu.
The keyboard file must also be included in the advanced file operations. Any missing keyboard files will cause the software to revert to its appropriate default keyboard.
Default keyboard
Sets the custom keyboard layout used for general text input when soft keyboards are enabled.
Number input keyboard
Sets the custom keyboard layout used for HTML number input fields.
Telephone input keyboard
Sets the custom keyboard used for telephone input fields.
Email input keyboard
Sets the custom keyboard used for email input fields.
URL input keyboard
Sets the custom keyboard used for URL input fields.
Use system keyboard for cross-origin iframes
When enabled, pages loaded inside cross-origin iframes will automatically use the device system keyboard instead of custom keyboards. Custom keyboard input cannot be injected into iframes from a different origin. Disable this only if you want to force custom keyboards everywhere, including cross-origin iframes.
Share the post "Profile Configuration Options"