
Auto-enrollment assigns license seats automatically as devices check in, reclaiming seats when devices become inactive. This requires less administrative effort than manual assignment, but provides less control over SmartBrowser devices. For applications that require more control or operate offline, consider using manual assignment. More information on manual assignment seat management can be found here.
Editing Auto-Enrollment Configurations
In the 'License Details' dashboard in SmartHub, select the ‘Edit Auto-enrollment’ button at the bottom left of the page.
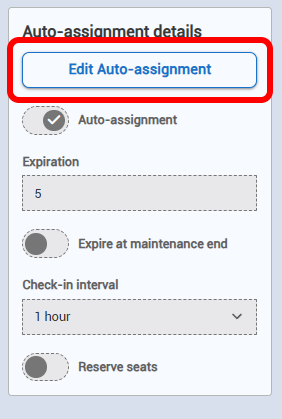
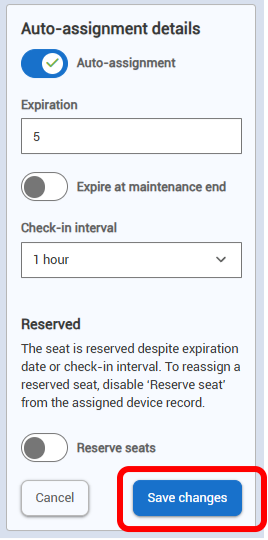
At this point, the expiration, check-in interval, and reserve seats settings can be configured.
The expiration can be set between 1 and 5 days.
The check-in interval can be set from 1 to 4 hours.
Enabling the 'Expire at maintenance end' toggle will set the seat expiration to the date the maintenance license expires. This toggle is only available if a valid maintenance license is configured. More information on maintenance licenses can be found here.
Enabling the 'Reserve seats' toggle will reserve the seat for all auto-enrolled devices, regardless of the expiration date or check-in interval. More details about seat reservation can be found here.
Select the ‘Save changes’ button.
Configuring a Device for Auto-enrollment
To configure a device for auto-enrollment, you must configure the SmartHub settings on the SmartBrowser device. Detailed instructions on how to do this can be found here.
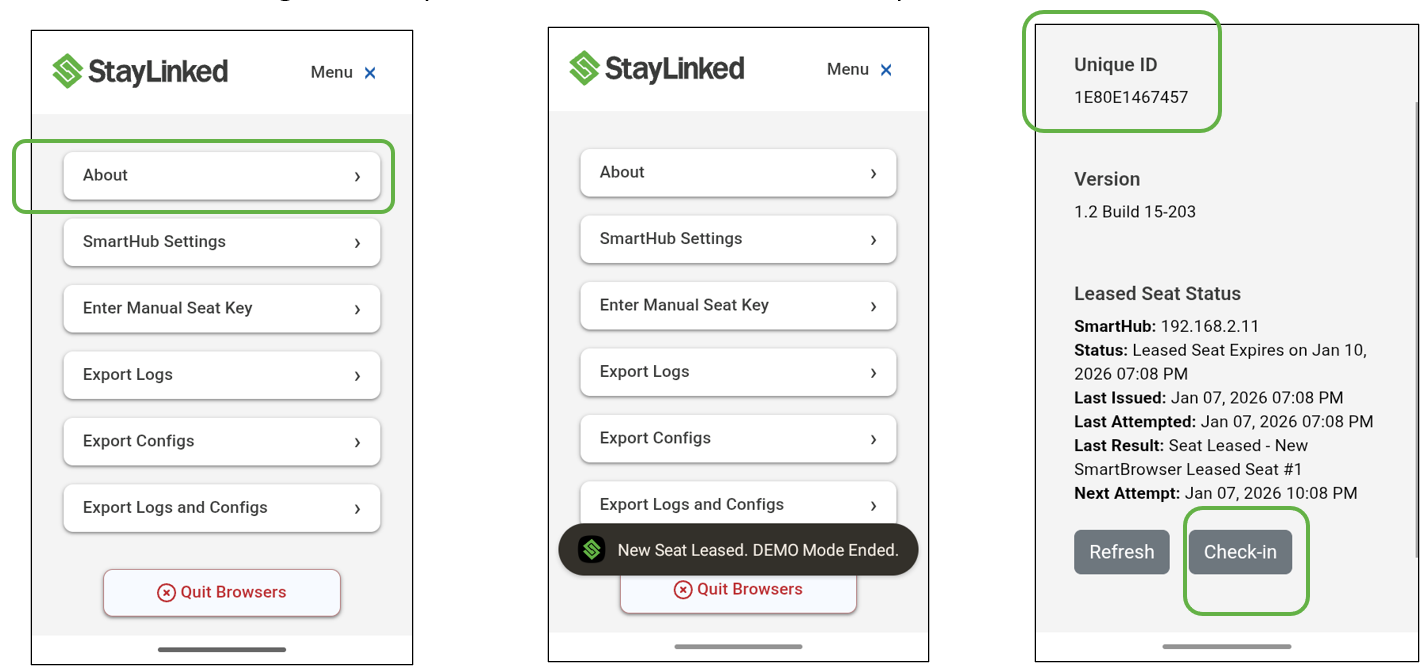
To confirm that the device has leased a seat, select the ‘About’ button in the SmartBrowser menu.
Once the seat is leased, the device will display the message 'New Seat Leased. DEMO Mode Ended'.
If your device has not yet leased a seat, try tapping the ‘Check-In’ button on the 'About' screen.
The Android OS has assigned a Unique ID for the device, shown on the top left of the 'About' screen.
Back in the 'License Details' dashboard in SmartHub, the newly licensed device appears in the list of assigned seats as shown below. If it is not visible, try refreshing the browser page on the computer hosting SmartHub.
The License Details dashboard provides information on all known mobile devices, times they were granted seat assignments, latest status, type of seat, and expiry date down to the minute.
Editing Seat Behavior for Individual Devices
To edit the seat behavior for an individual SmartBrowser device, select the blue ‘Client ID’ of the desired licensed device.

The ‘Edit seat’ pop-up menu is where the behavior is configured for a single mobile device/seat. Client ID, Manufacturer, and Model are pre-filled. Manufacturer and Model can be edited.
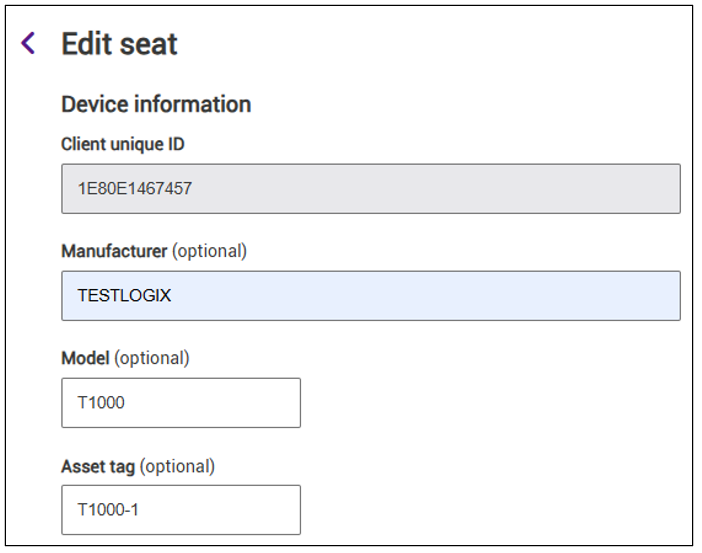
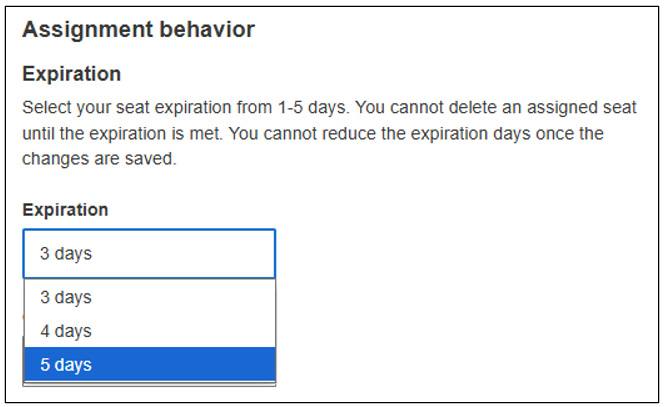
In the Assignment behavior section, the seat expiration period and check-in interval for a specific device can be adjusted.
The seat expiration can be increased up to 5 days. Once the changes are saved, you cannot reduce the expiration days.
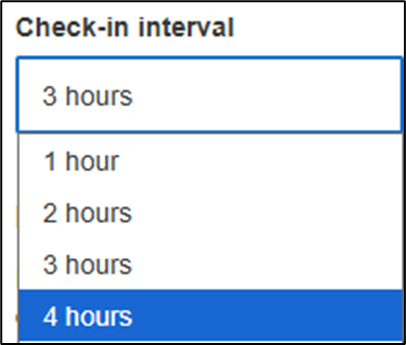
To set the check-in interval, select the drop-down box and select the desired interval.
Now, at the bottom of the page, select the ‘Save Changes’ button to save the chosen configuration.
Reserving a Seat
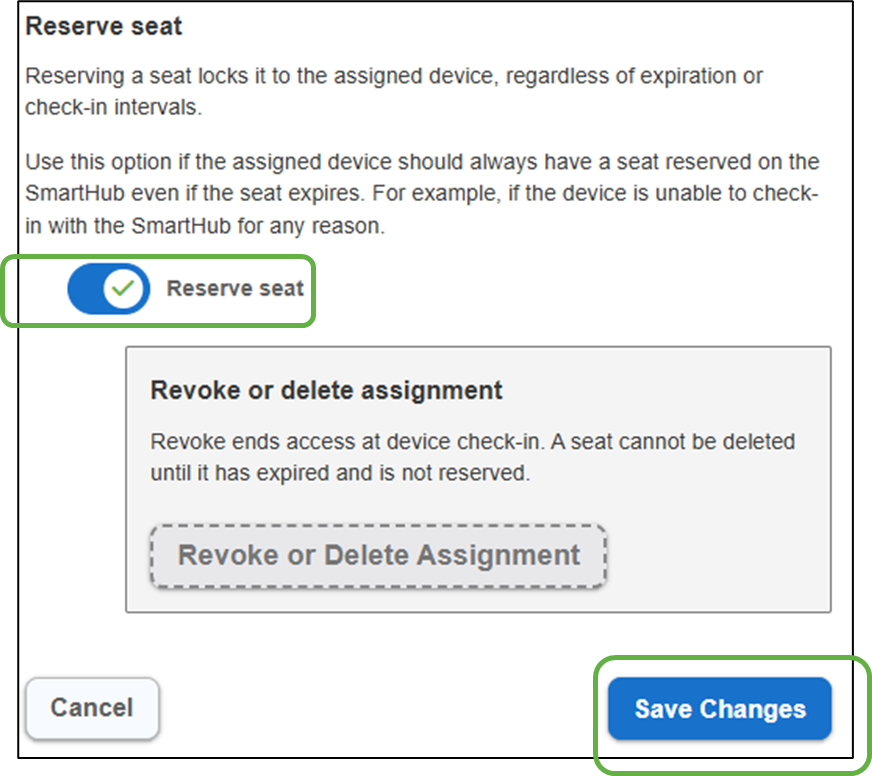
A reserved seat ensures that license capacity in SmartHub is set aside for the designated device, regardless of the expiration date, check-in interval, or fleet changes.
It is important to note that reserving a seat does not prevent seat expiration. If the device is unable to connect to SmartHub before the seat expires, the SmartBrowser device will enter demo mode until it is able to check in and reclaim its seat.
Devices with a reserved seat will hold that seat indefinitely and must be manually revoked.
To reserve a seat, select the blue ‘Client ID’ of our device that just leased a seat.

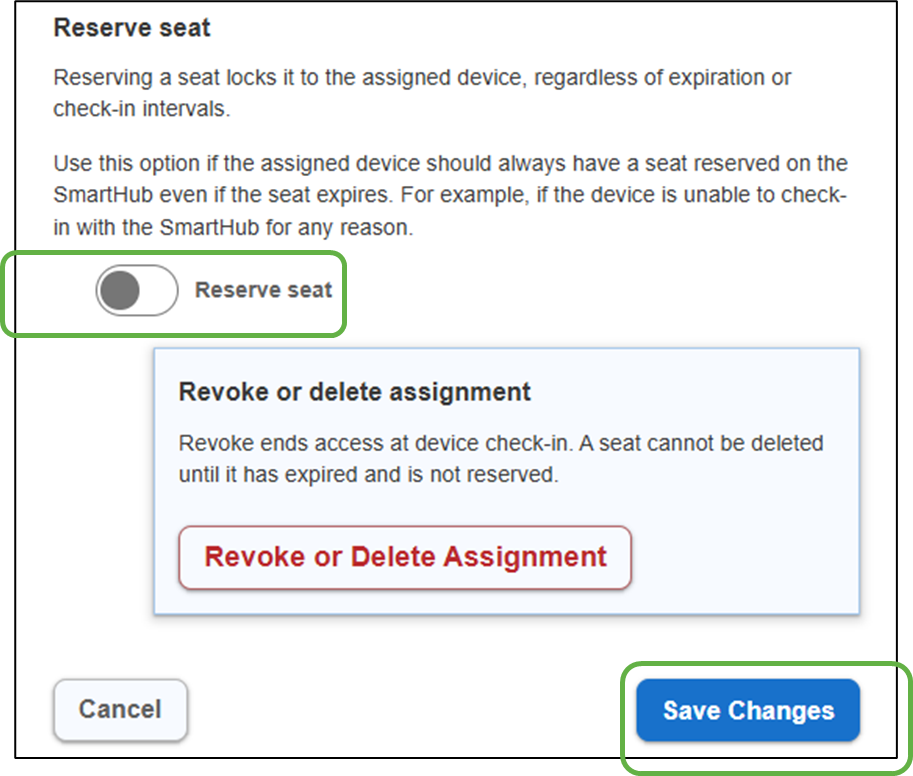
Enable the 'Reserve Seat' toggle to reserve the seat.
Select ‘Save Changes’.
Back in the ‘License Details’ dashboard, our device is now shown as ‘Reserved’.

Revoking an Assigned Seat
Revocation prevents unused devices from holding seats indefinitely.
To revoke an assigned seat, select the blue ‘Client ID’ of the desired SmartBrowser device.

Before a license seat can be revoked, it must first be unreserved.
To unreserve the seat, disable the 'Reserve seat' toggle.
Select ‘Save Changes’
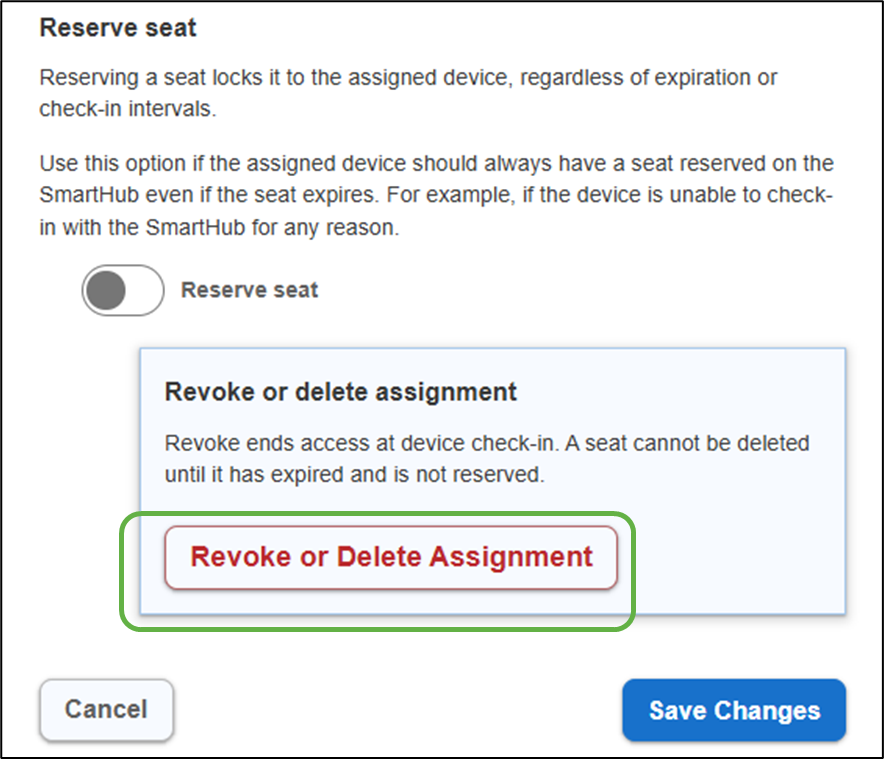
Notice that when the seat is not reserved, the option to Revoke or Delete Assignment is active (shown in red).
Select the ‘Revoke or Delete Assignment’ button.
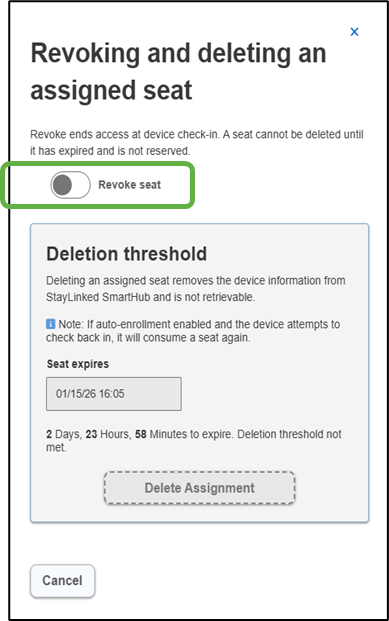
Enable the 'Revoke seat' toggle to revoke the license seat.
Back in the ‘License Details’ dashboard, once the browser window is refreshed, our device status has changed from ‘Active Auto’ to ‘Revoked Auto’, and the seat type has changed from ‘Reserved’ to ‘Dynamic’.

Revoked Seat Behavior
Devices that have had their license seat revoked will enter demo mode upon checking in to SmartHub.
To prevent a device from automatically acquiring another license seat on check-in, either leave the device entry in the Assigned Seats list on the License Details dashboard in SmartHub or clear the credentials for SmartHub IP/Host Name in SmartBrowser on the device.
Deleting Expired Assignments
To delete all expired assignments from the 'Licensing Dashboard' in SmartHub, select the ‘Delete Expired Assignments’ button.

Select ‘Delete’ in the next window to confirm.
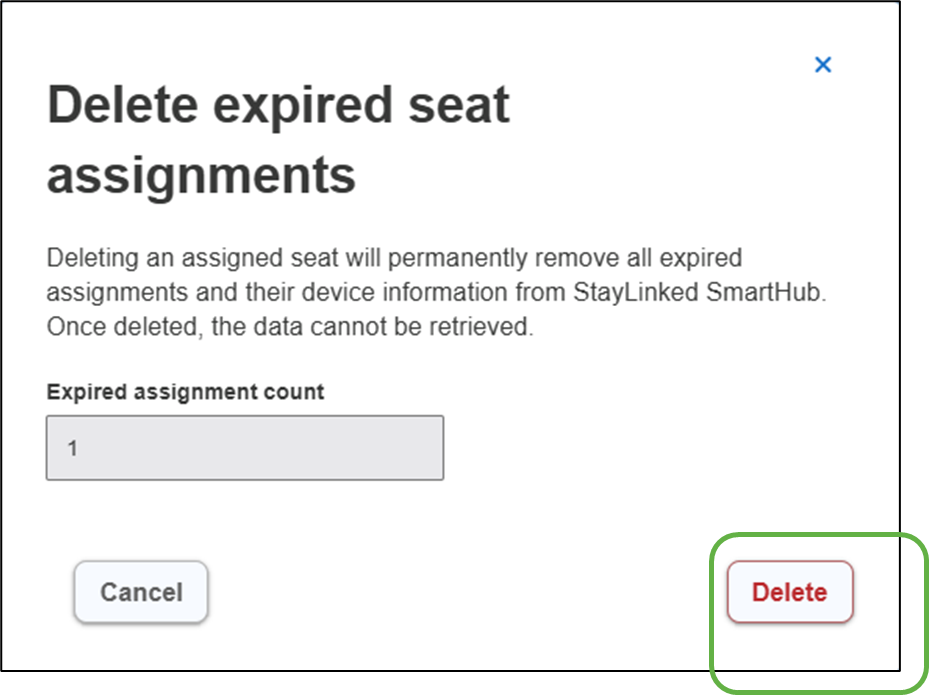
All expired assignments have now been removed.
Share the post "Auto-Enrollment Seat Management"