
Manual assignment requires an administrator to assign seats explicitly. This provides greater control, but requires more administrative effort than auto-enrollment. More information about auto-enrollment can be found here.
Configuring a Device for Manual Assignment
Begin by entering Admin Mode in SmartBrowser. Detailed instructions on accessing Admin Mode can be found here.
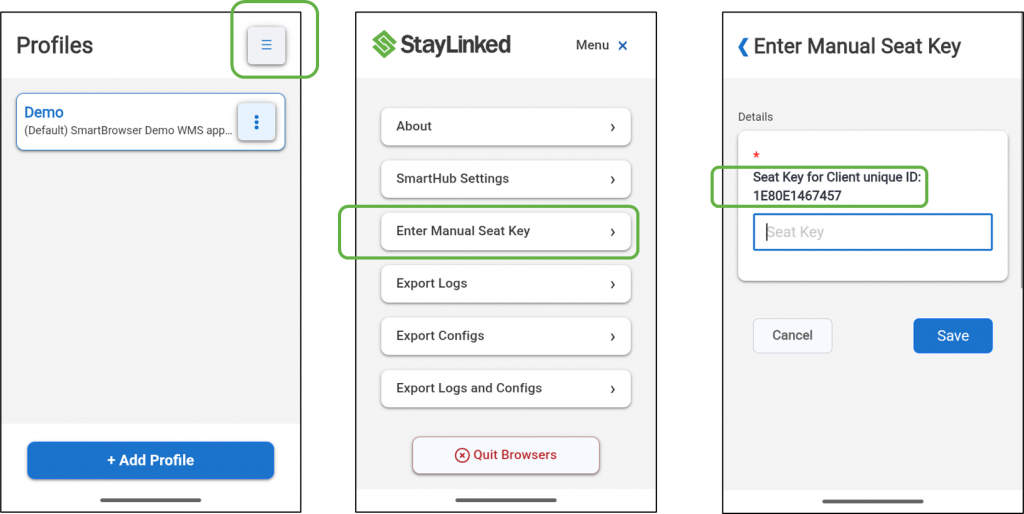
Select the hamburger menu at the top right.
Select the ‘Enter Manual Seat Key’ button.
The next screen prompts you for a ‘Manual Seat Key’.
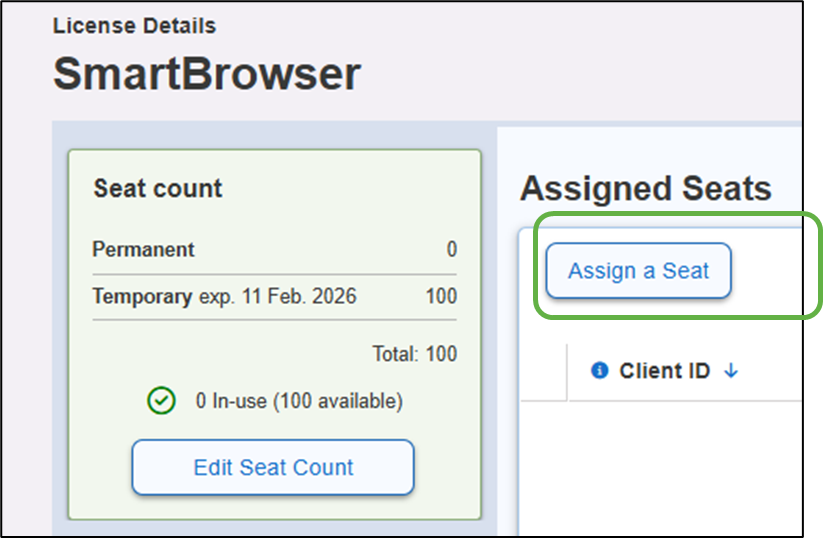
In SmartHub, select the ‘Assign a Seat’ function from the 'License Details' dashboard.
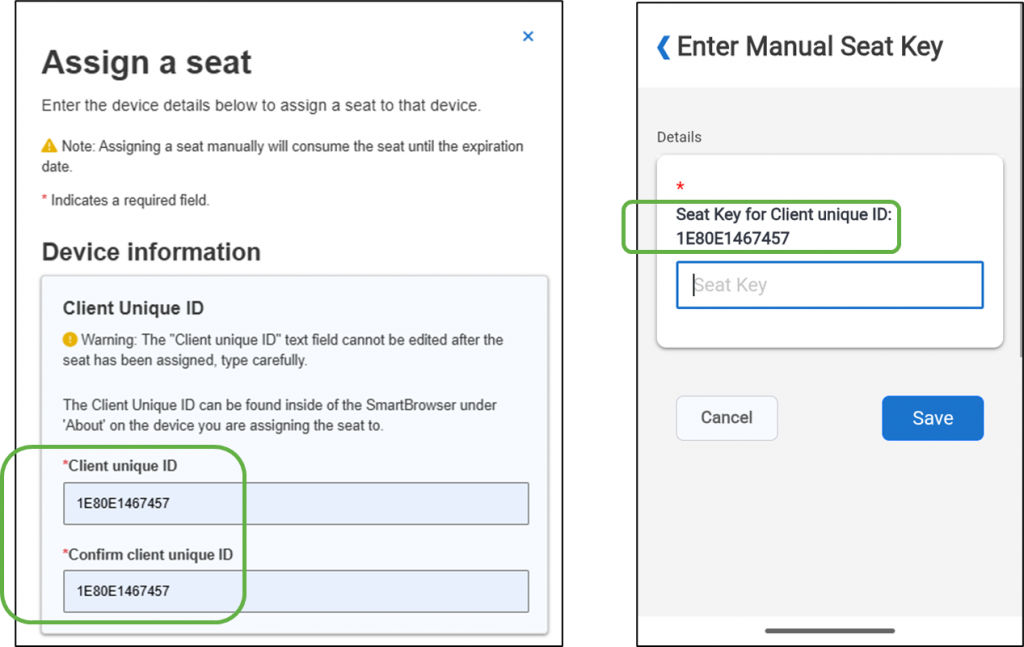
A pop-up menu appears.
Enter the Client ID of the mobile device into the appropriate fields in the SmartHub pop-up window. It is important to note that the Client ID cannot be edited after the seat has been assigned.
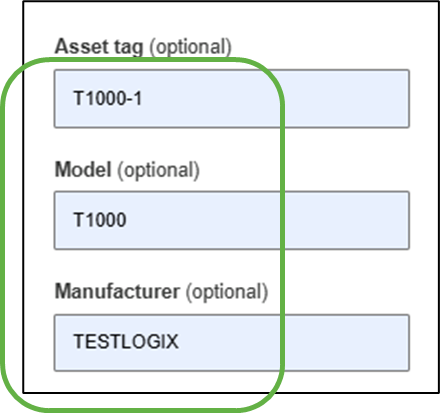
The asset tag, model, and manufacturer fields are optional, but helpful in managing large device fleets.
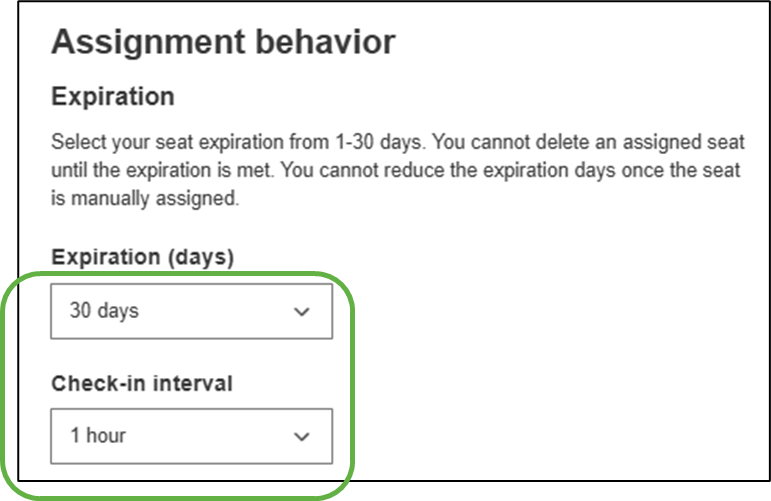
From here, you are able to set the seat expiration and check-in intervals.
Unlike Auto-enrollment, the expiration timeframe for a manually assigned seat can be set to a maximum of 30 days.
Although a manually assigned seat does not check in to renew its seat, a check-in interval must be defined to support package distribution and revoking the manual license if required.
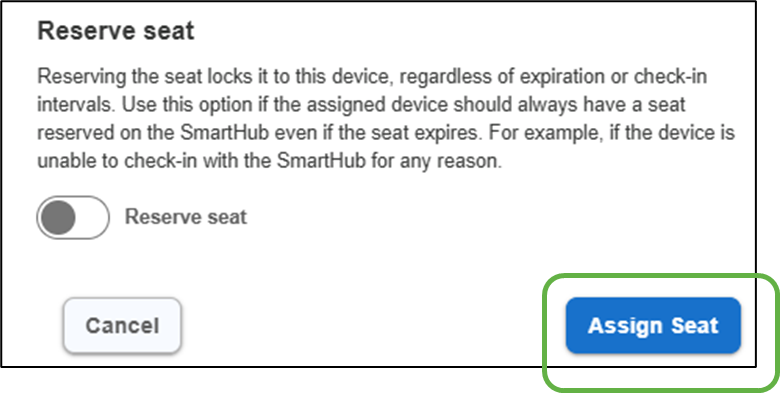
To ensure a seat is available for the device once the manually assigned seat expires, enable the 'Reserve seat' toggle.
Now select ‘Assign Seat’ at the bottom of the pop-up menu.
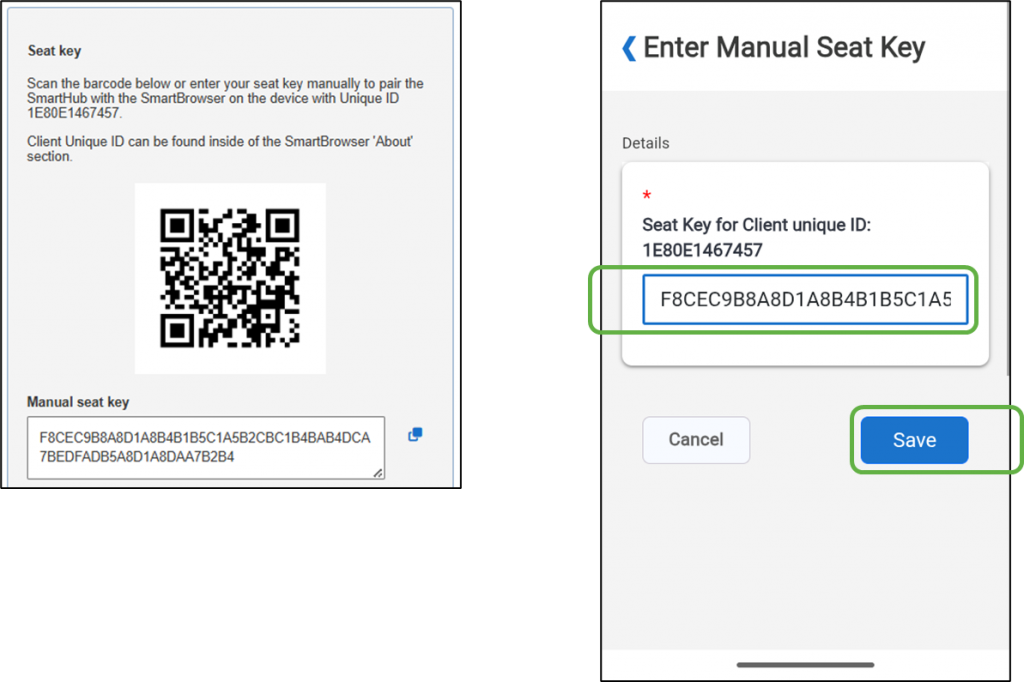
A pop-up window appears in SmartHub containing the Manual seat key.
Enter the key information by either scanning the QR code with the SmartBrowser device or manually entering the manual seat key into the Seat Key input field in SmartBrowser.
Verify the information is correct, then select the ‘Save’ button in SmartBrowser.
The device now appears in the 'License Details' dashboard in SmartHub.

Revoking a Manually Assigned Seat
In order to revoke a manually assigned seat, you must be able to access SmartBrowser on the target device. If the device is lost or damaged to the point where SmartBrowser cannot be accessed, the license must expire naturally per its configured expiration timeframe (up to 30 days) before it is free to use on a different device. In this case, contact StayLinked support for a temporary license if required.
Select the blue ‘Client ID’ for the seat we wish to revoke.

From the ‘Edit seat’ pop-up window, select the ‘Revoke or Delete Assignment’ button. This button is only available if the 'Reserve seat' toggle is disabled.
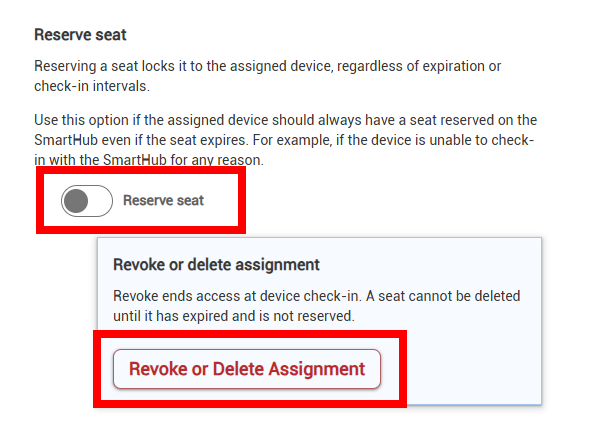
In the next pop-up window, enable the ‘Revoke seat’ toggle.
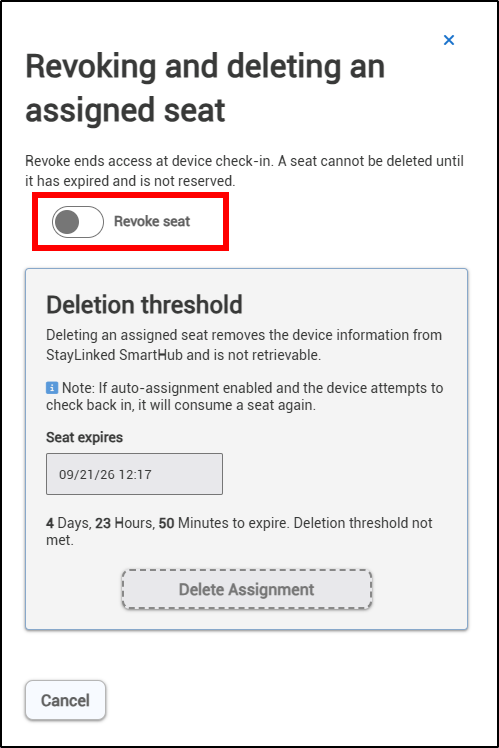
Back in the 'License Details' dashboard, the seat status now indicates ‘Revoked Manual’.

It is important to note that the seat will only become available once the SmartBrowser device checks in to SmartHub. Detailed instructions on how to configure SmartHub settings for check-in can be found here.
Once the SmartBrowser device checks in with SmartHub, it will enter DEMO Mode.
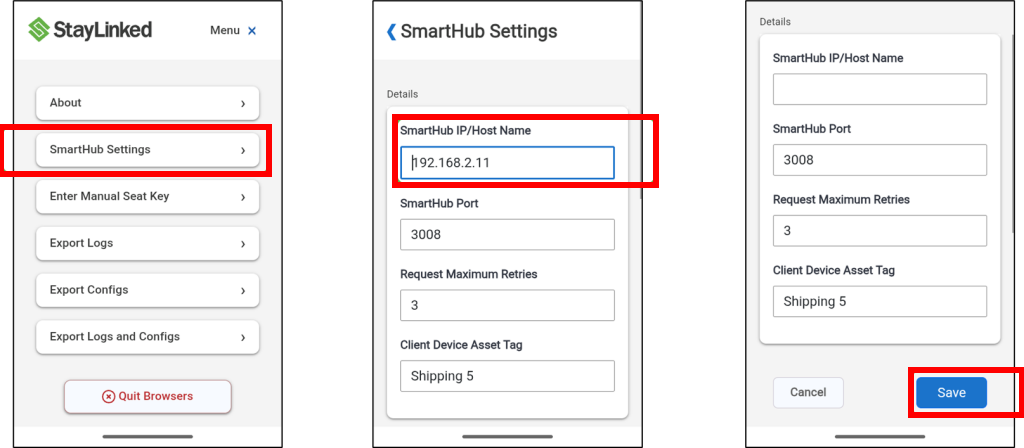
To prevent the device from checking in with SmartHub and being granted a seat via auto-enrollment, select ‘SmartHub Settings’ again and delete the SmartHub IP/Host Name.
Tap ‘Save’.
Share the post "Manually Assigned Seat Management"