Overview
Designed specifically for the industrial environment, SmartBrowser bridges the gap between modern web applications and the operational demands of the warehouse and supply chain floor. Unlike consumer-grade browsers, SmartBrowser is purpose-built to lock down access, streamline workflows, and give enterprises total command over how Task Workers interact with mission-critical systems like WMS, ERP, and other inventory platforms.
Advantages
With SmartBrowser, organizations can:
- Secure the Mobile Workforce: Prevent unauthorized internet access, block risky applications, and maintain a controlled, policy-driven environment across all devices.
- Maximize Productivity: Eliminate distractions and latency by tailoring the user interface and delivering only what’s needed for the task at hand—speeding up tasks like picking, staging, and shipping.
- Ensure Consistency and Control: Configure, manage, and update browser sessions centrally, ensuring every device behaves exactly as intended—no surprises, no workarounds.
- Support Your Future: With a product roadmap focused on long-term stability and continuous innovation, SmartBrowser is an investment you can trust—whether you're modernizing today or planning for tomorrow.
StayLinked SmartBrowser transforms standard browser-based workflows into secure, efficient, and tightly controlled operational tools—keeping your supply chain moving and your workforce focused.
Installing the SmartBrowser APK
Download the SmartBrowser APK to your PC from the StayLinked Downloads Portal.
In 'Settings' on the mobile device, ensure USB preferences are set to ‘File Transfer’.
Connect to the mobile device via USB to your PC.
Drag the SmartBrowser APK into the ‘Downloads’ directory on the mobile device.
Open the ‘Files’ application on the mobile device. Navigate to the ‘Downloads’ directory, select the SmartBrowser APK, following the prompts.
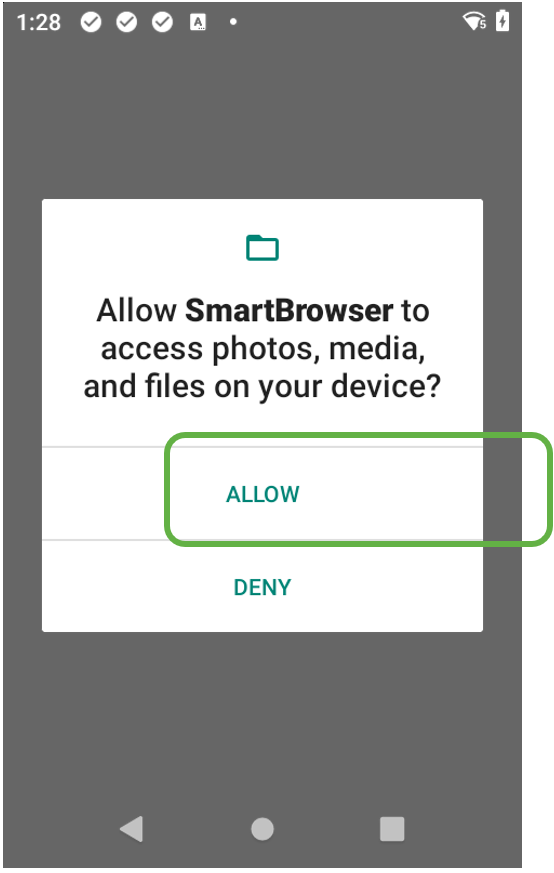
Open the SmartBrowser and allow access to manage all files.
Tap the back arrow on the top left of the screen.
The ‘Sessions’ screen appears, and the Browser is now installed.
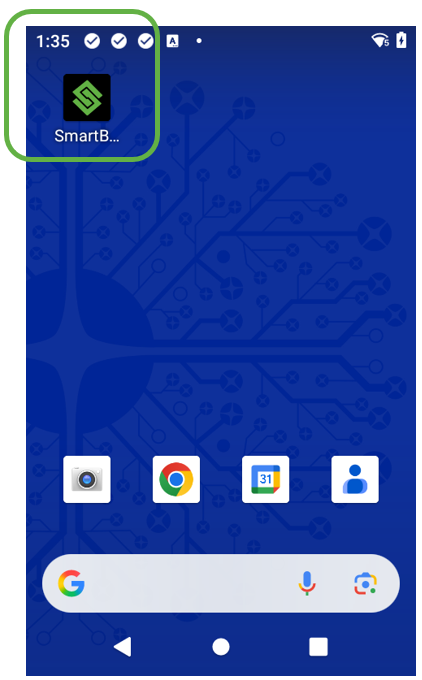
Close the APK on the mobile device and the SmartBrowser icon appears on the Home Screen.
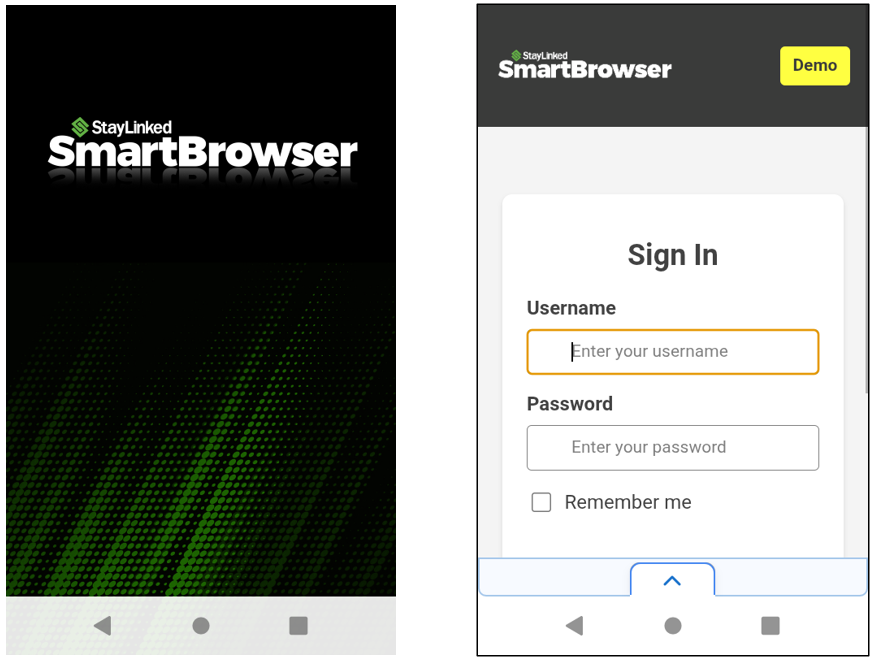
The next time the APK is launched, the SmartBrowser splash screen appears briefly, before the log-in screen for the StayLinked WMS Demo appears by default.
Typing any Name or Password
Accessing Admin Mode
Open the drawer at the bottom of the screen by tapping the Up Arrow.
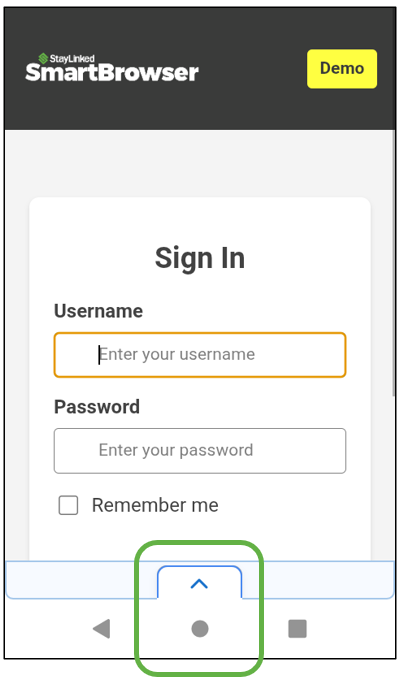
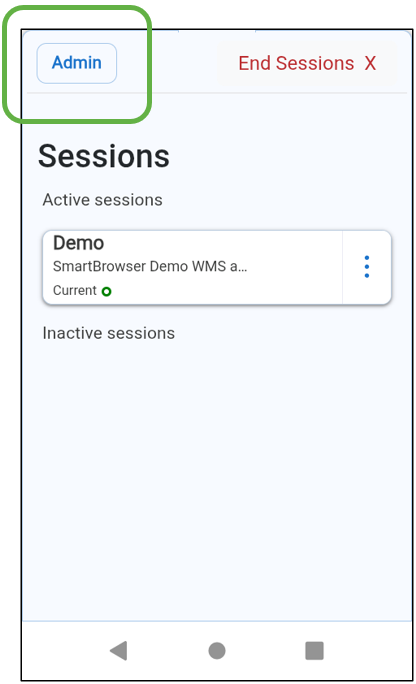
The ‘Sessions’ screen appears, indicating a current active session with The StayLinked WMS Demo by default.
Tap the ‘Admin’ button on the top left.
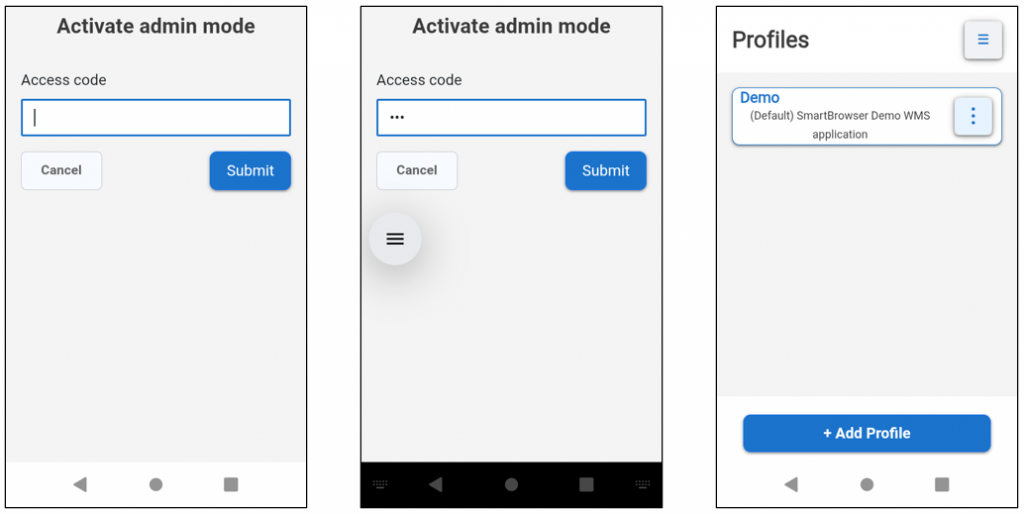
Access to ‘admin mode’ requires an access code.
Tapping into the entry field activates the onscreen keyboard. If the access code hasn’t been changed from the default, enter ‘esp’ and press the ‘Enter’ button on the onscreen keyboard or the ‘Submit’ button.
The ‘Profiles’ screen appears next.
Creating and Editing Profiles
Launch the SmartBrowser APK and enter ‘Admin mode’.
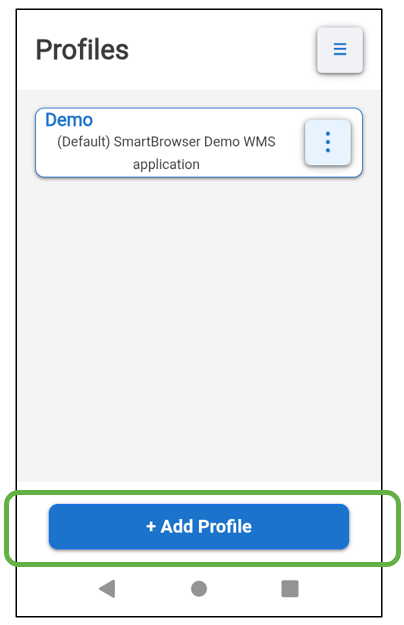
The ‘Profiles’ screen appears.
Tap the ‘+ Add Profile” button to add a Profile.
For this example, we have entered the Profile Name, Description, and URL pertaining to the StayLinked Downloads Portal.
Required fields are indicated with a *.

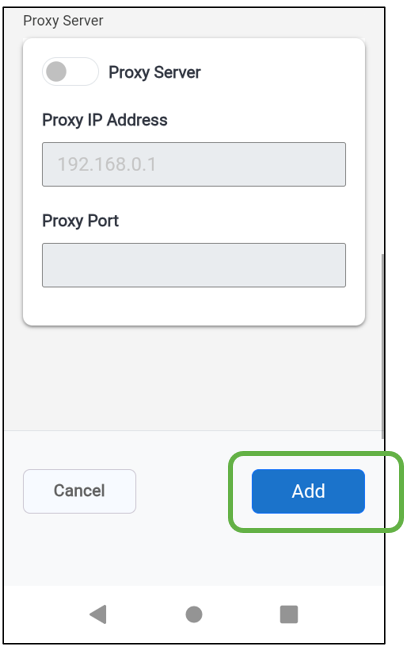
Scroll to the bottom of the screen and tap “Add”.
The ‘Profiles’ screen now displays the new ‘Portal’ profile just created.
In the ‘Portal’ profile, tap the kabob menu icon to the right.
Select ‘Make default profile’ and tap the ‘Continue’ button.
The ‘Portal’ Profile moves to the top of the list in blue as the new Default Profile.
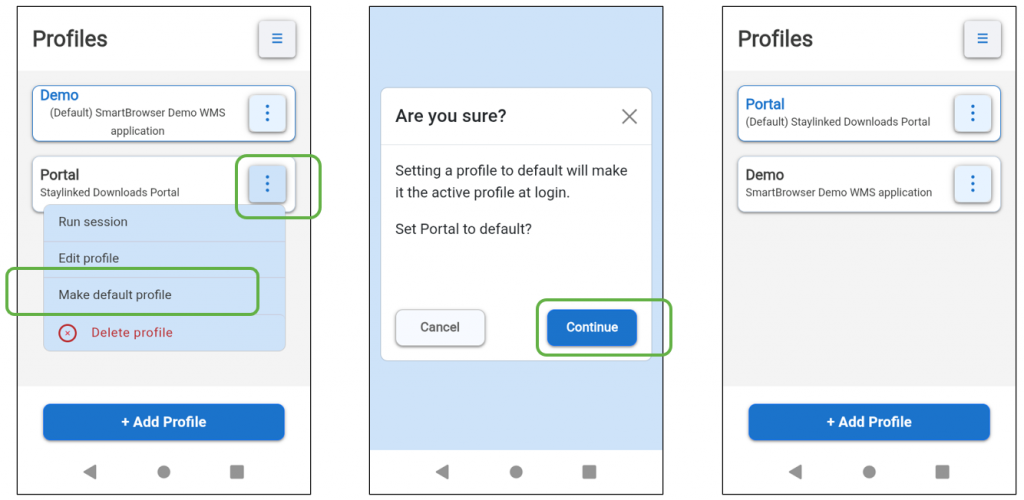
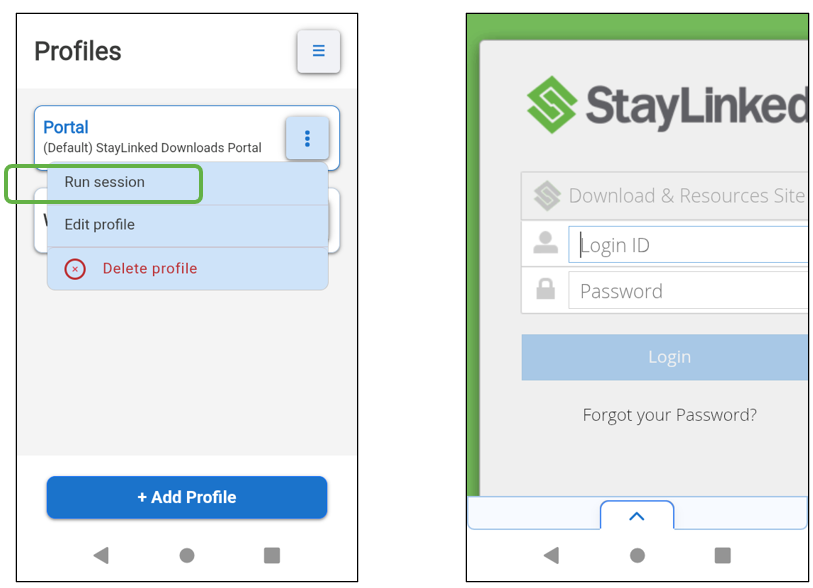
Tap the kabob menu Icon to the right of the ‘Portal’ profile and select ‘Run session’.
The StayLinked downloads portal webpage now appears.
Viewport Mode
In the previous example, the StayLinked Portal web page appears small on a mobile device.
ViewPort mode is available to address this scenario.
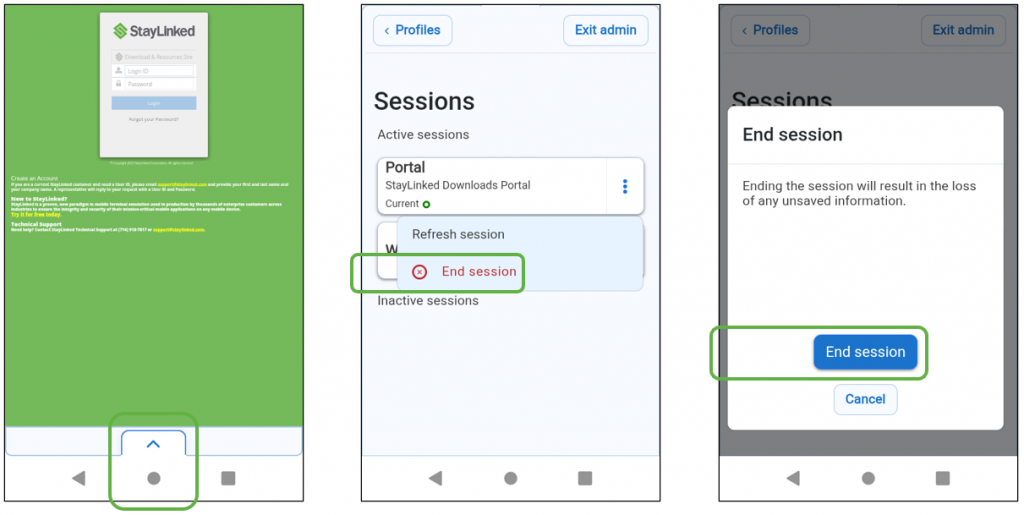
Open the drawer at the bottom of the screen to enter the ‘Sessions’ screen.
From the ‘Portal’ session kabob menu on the right, select ‘End session’.
SmartTip! It is considered best practice to end any open session before making changes to a profile.
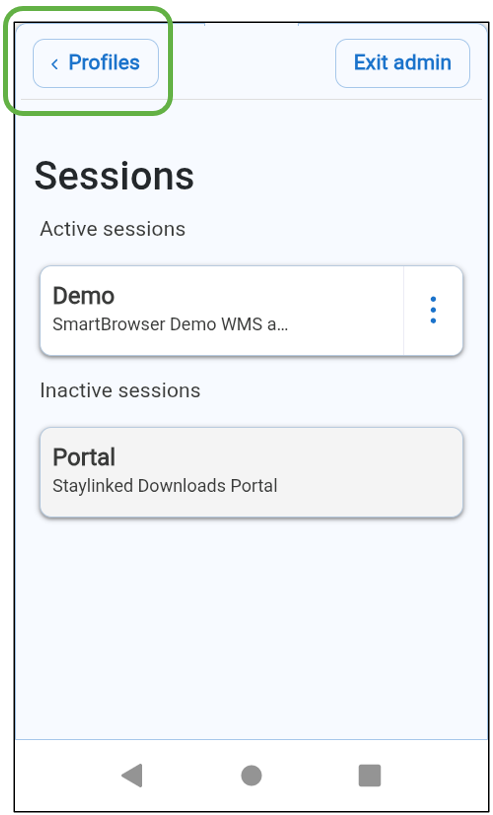
Tap the ‘<Profiles’ button on the top left to leave the Sessions screen and Enter the ‘Profiles’ screen.
Tap the kabob menu icon to the right of the ‘Portal’ profile and select ‘Edit profile’.
Scroll down and turn on the slider for ‘Insert Viewport’.
Scroll down and tap the ‘Save’ button.

Back on the ‘Profiles’ screen, select ‘Run session’ from the ‘Portal’ profile kabob menu.
Now with ‘Viewport’ enabled, the web page is zoomed in to the cursor position.
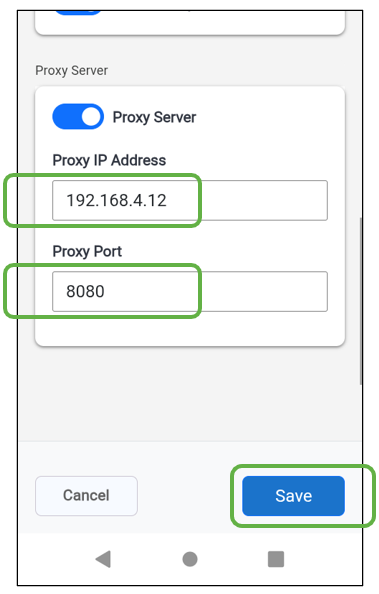
Proxy Server
If a proxy server is in use, turn on the slider for ‘Proxy Server’.
The Proxy IP Address can be an IP address or a URL.
Enter a Proxy Port and tap the “Save” button.
Share the post "SmartBrowser Quick Start Guide"