What is Multi Session?
Multi Session is a version of StayLinked licensing that allows for the user to access multiple emulation sessions simultaneously on one device. Creating the opportunity for them to toggle between different emulation hosts and sessions. This is a beneficial attribute to some organizations, specifically those that have multiple host emulations on multiple server installations needing individual transactions recorded as the user progresses through their work flow.
First step – Install a license
Installing a multi session license is similar to the single session license installation and can be installed on a server with or without existing single session licensing.
In the StayLinked Administrator, navigate to Server Licenses. Right click in the right side window, select Add. Update the Permanent and Temporary Client seats. Copy and paste the StayLinked Multi Session License Key in to the appropriate field. Click Validate. Click Install License Key.
Upon installation of a multi session license on the StayLinked server, the system is set to default two multi-sessions per seat. You can update the checkbox in the device group, when a multi-session license is installed.
When working with more than two multi-sessions, you will need to update the server to reflect the additional multi-session seats.
Note: On the device, Alt + S is the default keystroke to toggle between the multi sessions.
Instructional Video: Installing a License Key
Mixing single and multi-session
As an example, assume the StayLinked server has installed the following licenses:
- A single license for 10 single-session connections.
- A license for 5 multi-session connections
This would result in 15 unique devices that may be connected at any given time. For 5 of those devices, each could have more than one session running, up to a limit of 10 each. This server could be running 60 total sessions, but no more than 15 different devices.
Any device can connect to the server if licensing is available, meaning you could use vehicle mounts today, cell phones tomorrow, handhelds the next. A Device would be given a ‘No Seats Available’ message if it tries to connect as the 16th device at the same time.
Most customers keep it simple with a specific number of single-session licenses to meet their maximum server load. You can freely add and remove devices and clients to the environment as long as the concurrent license limit on the server is not exceeded.
Use Device Groups to allow Multi Session Configuration
To enable multiple connections allowed per device at the server level, follow:
Emulation Settings > Device Groups > Select the desired Device Group > Check ‘Allow Multi Sessions’
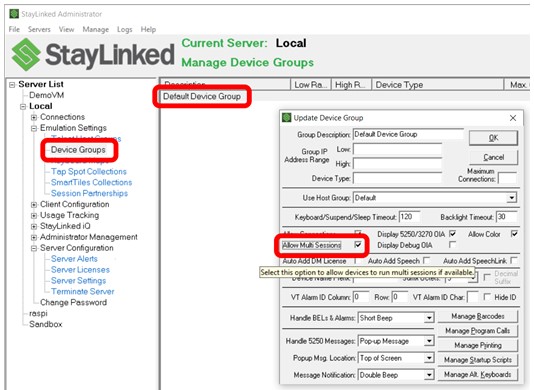
Enable the multi sessions for the device group.
Configuring for more than 2 sessions
To set the number of connections higher than the default 2 sessions, allowed per device; this must be configured at both the Device Group and the Client Setting at the Server level.
Setting a maximum per device at the Server
To set the Device Group, follow:
Server Configurations > Server Settings > Right mouse click the Default Device Group or anywhere on the main display panel when Multi Sessions > Set the maximum allowed.
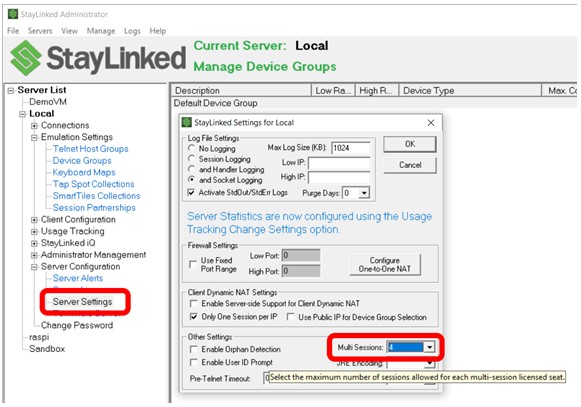
Specify the number of allowed connections. This is up to a maximum of 10 allowed connections.
To set the Client Setting, follow:
Client Configuration > Client Settings > Client > Multi Connection Limit
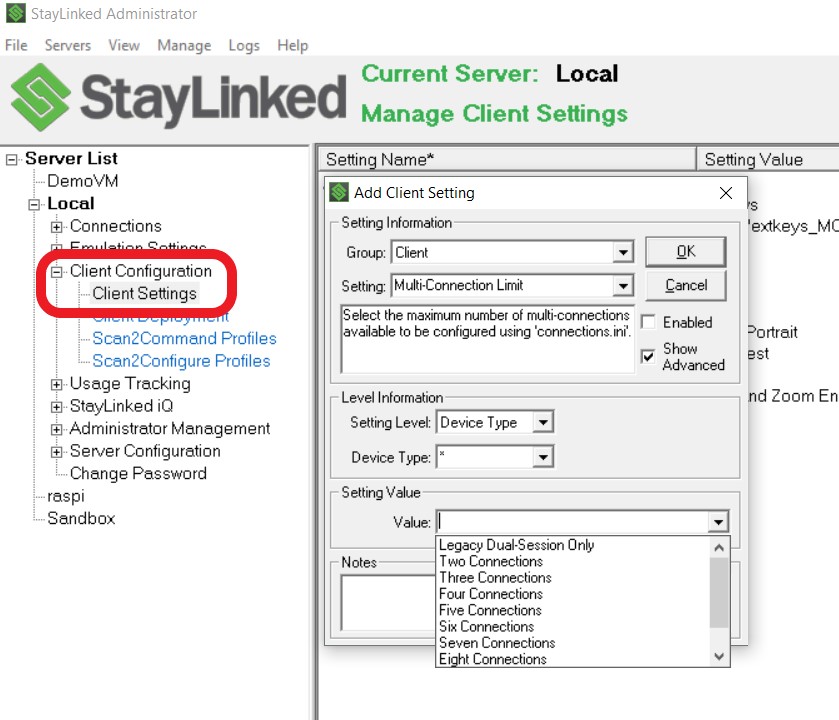
Specify for the client, the number of allowed connections. This is up to a maximum of 10 allowed connections. This should match the Device Group setting.
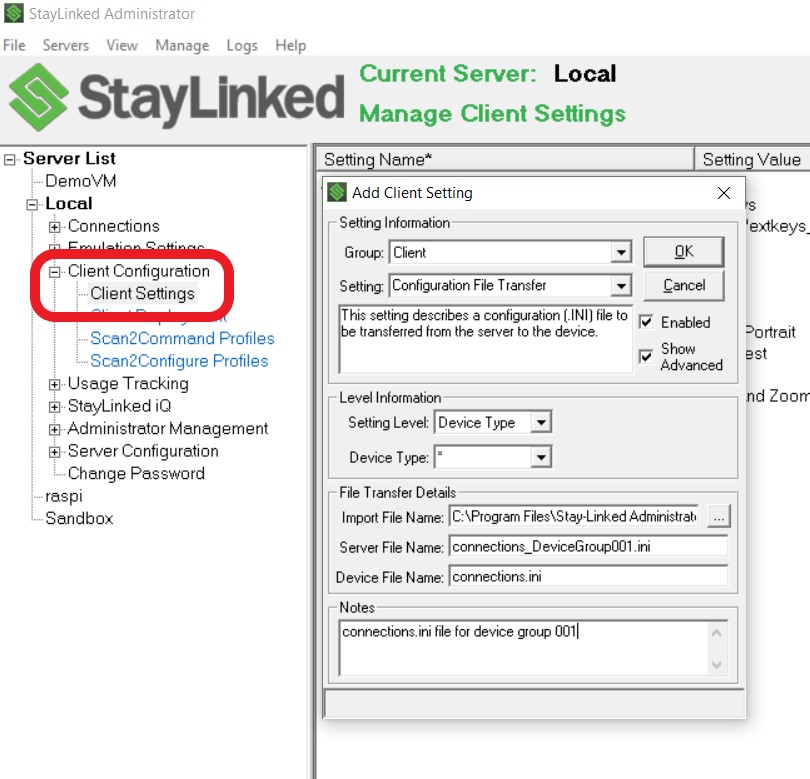
Connections.ini and pushing configurations
Some installations require the use of the connections.ini files. This file provides connection specific information to the client. Transfer the connections.ini file to the client device.
Client Configuration > Client Settings > Client > Configuration File Transfer > connections.ini
The following fields are available within the [defaults] section of a connections.ini file:
Client release v16.2 build 284 now supports automatic connections instead of prompting the user for the first selection.
auto_connection = X – This entry just under the [defaults] tag specifies which session to automatically start when the client launches. For example:
[defaults]
auto_connection = 1[connection1]
name = Prod
server = 192.168.68.186
port = 3006
columns = 80
rows = 25
hotkey =
menukey = 023100
preferred_host_name =[connection2]
name = QA and Dev
server = 192.168.68.186
port = 3006
columns = 21
rows = 16
hotkey =
menukey = 093200
preferred_host_name =
This sample file would allow connections to both Prod and QA/Dev, but would automatically start a connection to Prod when the client launches. Users starting a second session would be prompted for the first or second entry.
The following fields are available within each connections.ini "Connection" entry for configuration:
Name – Provide a name for the connection that will appear for the user to select from.
Server – Address or DNS/FQDN name of the server to connect with
Port – Server port, almost always 3006 which is the default handshake port of the server.
Deviceid – Workstation name of the device on the host system. This is described in the device naming guide here.
Client release v16.0 build 262 and later supports the mnemonics [blank] and [default] for the deviceid value. Using [blank] will intentionally return a blank value, while [default] will use the deviceid as it appears in the standard staylink.ini configuration file.
Client release v16.2 build 284 and later supports [prompt_user] for dynamic device ID by the user at session startup.
Columns – Client screen size in columns
Rows – Client screen size in rows
Hotkey – The client key code to switch to this connection, for example: [key=900004]
Preferred_host_name – The telnet host entry in the host group assigned to this connection. This will automatically select this host entry if it's available as an option in the host group.
keyboard_style_XXXXXX – Client build 260 and later supports SmartKeyboard styles.
Starting with Android Client release 15.5 build 260, connections.ini will also support different SmartKeyboard styles for each connection type. These relate to the associated client settings, including support for custom keyboards with custom naming, for example:
keyboard_style_qwerty = myqwerty.xml
keyboard_style_numpad = 2
keyboard_style_numsym = 10
keyboard_style_ctrl = -1
keyboard_style_fkeys = 5250_fkeys.xml
This would be custom keyboard for the QWERTY and FKEYS with style 2 and 10 for NUMPAD and NUMSYS. CTRL would be disabled.
This is an example or sample of connections.ini file contents
[defaults]
[connection1]
name=wunderground
server=192.168.1.10
port=3006
deviceid = rf01
columns=95
rows=25
hotkey=[key=900001]
preferred_host_name=wunderground[connection2]
name=local
server=192.168.1.10
port=3006
deviceid = rf02
columns=95
rows=25
hotkey=[key=900002]
preferred_host_name=local[connection3]
name=pub400
server=192.168.1.10
port=3006
deviceid = rf03
columns=95
rows=25
hotkey=[key=900003]
preferred_host_name=pub400[connection4]
name=telehack
server=192.168.1.10
port=3006
deviceid = rf04
columns=95
rows=25
hotkey=[key=900004]
preferred_host_name=telehack
Note 1: For the connection dialogue to be seamless on the client device, the ‘preferred_host_name’ parameter must match the name of the configured telnet host in the host groups. Otherwise, the user will be presented with a choice from connections.ini and another if there are multiple hosts configured in the host group.
Note 2: The hotkey value can be any keycode that is generated by the device or it can be a fictional value that does not already appear in the keyboard maps.
Setting Session Shortcuts
When using Multi Session there are two ways to enable fast session switching. They are both located in the Client Configurations. The easiest way to enable this feature is with Extended Keys. If you are using a touchscreen device, the system will need a configuration file transfer to enable this feature.
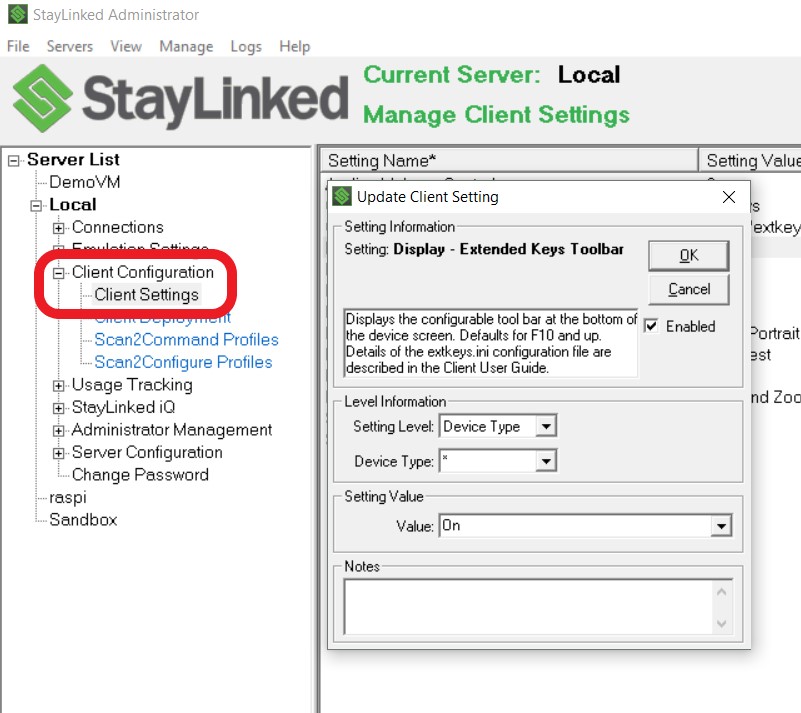
Enable Extended Keys Toolbar
This is to support fast session switching via hotkey. On the device, Alt + S is the default key stroke to toggle between the multi sessions.
Client Configuration > Client Settings > Display > Extended Keys Toolbar > On
Switching Session with touchscreen devices
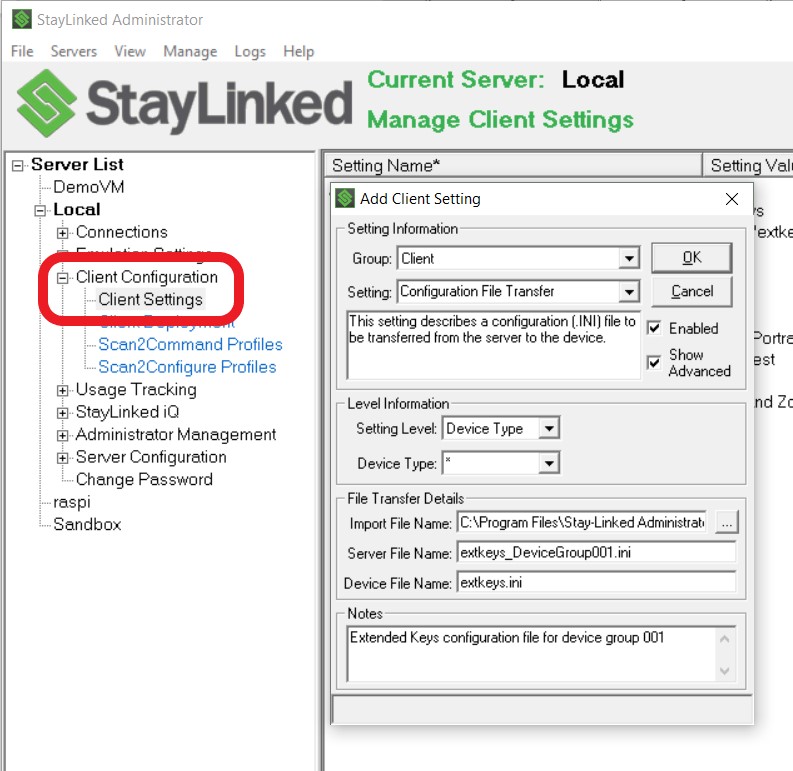
This is an optional step if you are configuring a touchscreen device or there are no available hardware keys that can be used for session switching.
Client Configurations > Client Settings > Client > Configuration File Transfer > extkeys.ini
[display]
font_size=12
min_width=1
[defaults]
button1=wunderground,[key=900001]
button2=local,[key=900002]
button3=pub400,[key=900003]
button4=telehack,[key=900004]
Note: The key value matches the hotkey value in connections.ini
Share the post "Multi Session Configurations"