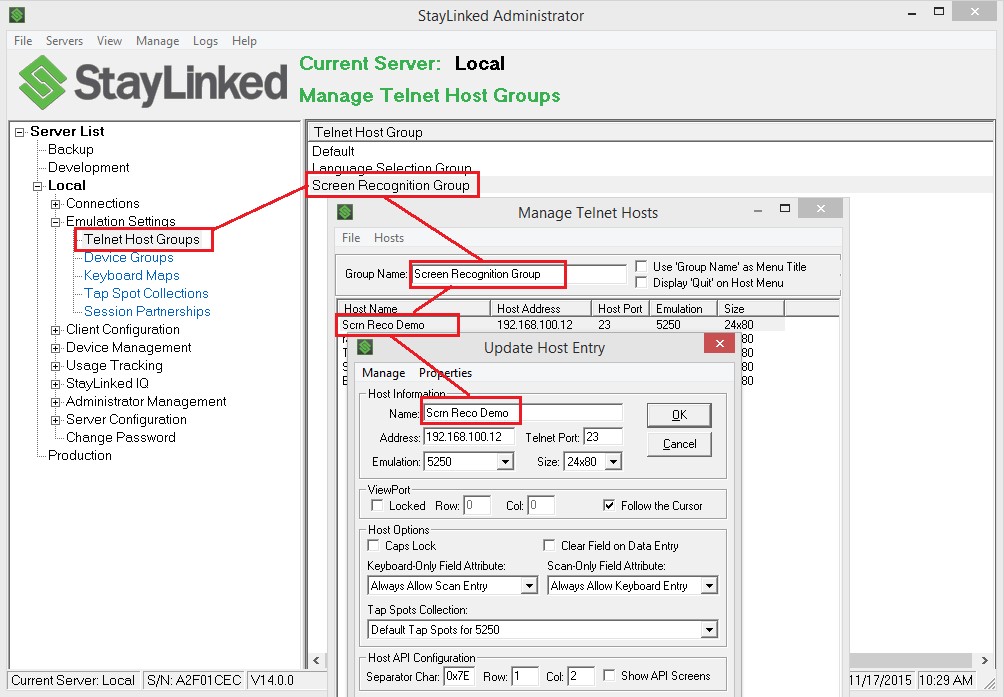
The Screen Recognition features are accessed using the telnet host entry dialogues.

If you have not selected the option to manage your screen maps from the dialogue to the right, you can access them from the Telnet Host Entry. The Telnet Host Entry can be configured by selecting Emulation Settings > Telnet Host Groups > double click on your host group > double click on your telnet server entry.
If you save your work and exit the Administrator, you can pick up where you left off by option clicking the Telnet Host Entry from the list of telnet servers in a host group. This provides the options to manage your screen maps, but not the actual screen recognition and reformatting.
The more advanced configuration and features are available from the ‘Manage’ pulldown menu within the telnet host entry.
Once you select to manage screen recognition for the selected telnet host entry, the Administrator will display a list of all recognized screens. This dialogue provides a list of all recognized screens on this Telnet Host Entry. From this list, all of the recognition events for each recognition instance can be managed and shifted up or down in the processing order. Recognized screens are processed in priority from top to bottom, with the server applying only the first recognition event found to match the presented screen.

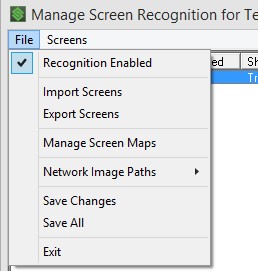
The File menu contains the following options:
Recognition Enabled: This on/off toggle will completely enable
or disable recognition features for the entire telnet host entry. This allows
you to create your configuration and then turn it on when you are ready for
testing or production. If a check appears next to this option, it means that
your configuration is active on this telnet host. Individual events may still
be enabled or disabled within the recognition event.
Import/Export Screens: These options allow you to migrate settings between telnet hosts. If you copy an entire telnet host entry, it will include the Screen Recognition settings. The import/export features allow you to copy the screen recognition features to another telnet host entry.

Manage Screen Maps: Screen maps are a copy of a hosted application screen. A screen map is required for screen reformatting features. They can be used by the designer tool to select recognition ‘strings’. The StayLinked server will watch each presentation event for the strings you’ve configured and test for a match. Once the recognition strings match, the screen will be recognized and substitutions/enhancements will be put in place for qualified devices. Devices are qualified by their display dimensions.
Starting in v15.2, screen maps can be individually exported and imported between StayLinked Servers. Right Click on a screen map in the manage screen maps area to export the individual entry. The file menu contains the option for import of these items.
Network Image Paths: Graphical elements used by Smart TE require image files to be distributed to devices. The standard method is to create an intranet page to host the required files. Without an image URL, the Client, Server and Administrator will use a local file path which requires the manual synchronization of these files among the Server and Administrator directories.
Save Changes: Saves any changes you’ve made to the current window.
Save All: Saves all changes made to the telnet host entry, telnet host group and includes all screen recognition and reformatting changes.
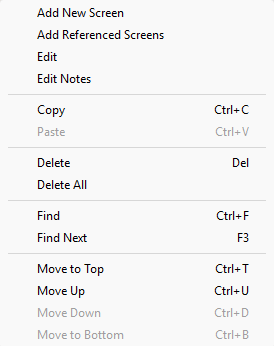
The following options are available from the Screens menu or by right clicking on a screen recognition instance in the list:
Add New Screen: Add a new recognition screen.
Add Referenced Screen: Add a new group of recognition events from another host entry. This feature is added in v16.1 and described in more detail HERE.
Edit: Make adjustments to the selected recognition screen.
Edit Notes: Make adjustments to notes created for any screen recognition events. This option requires server version 15.5 and is also available from the right-click context menu for each listed item.
Copy/Paste: Duplicate existing screens. This is very useful when different screen sizes will be connecting to the telnet host entry and or different devices need minor adjustments.
Delete: Remove an entry.
Delete All: Remove all entries.
Find: Locate items with the enter search value.
Find Next: Locate the next item in the search that matches your search value.
Move Up/Down: Change the priority of screens.
Move Top/Bottom: Move the selected item all the way to the top or bottom of the list.
Recognizing a Screen
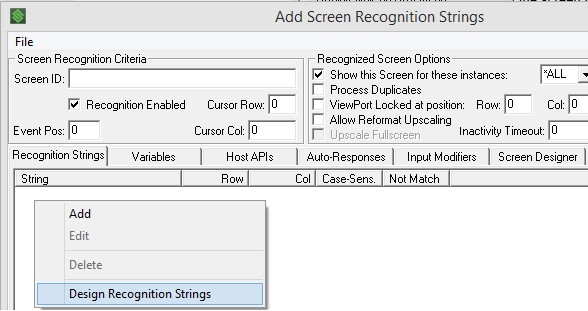
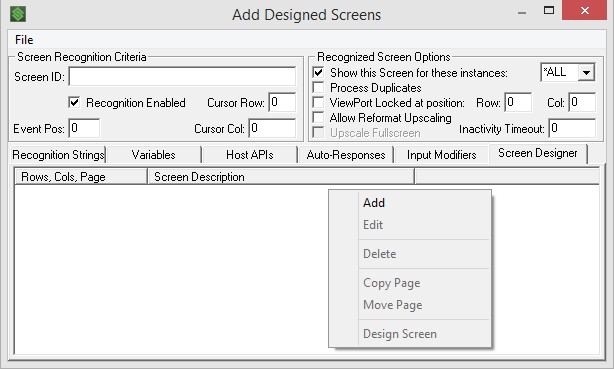
When you edit a recognition screen from the list of screen maps, you are presented with the following list of recognition options and events. Recognition is done by matching various display elements. You can right click to add each string, or select ‘Design Recognition Strings’ from the right click menu to select portions of the screen map as recognition strings.
Screen ID: Sets the name of this recognition screen to work with for this instance or event.
Cursor Row and Column: Sets the cursor position if you want this to be considered when the recognition review is done. Leaving the values at 0 and 0 will process the recognition review ignoring the current cursor position.
Recognition Enabled: Allows you to disable each individual recognition instance, which allows you more granular control over which events should be processed.
Show This Screen… : This option allows the screen to be hidden or displayed to the users, based on the number of times the screen has been seen. This can reduce the number of times redundant screens are presented and reduce the number of transactions between the StayLinked Server and Client. By example, this could be used to hide a screen when an auto response is used. Using this option improperly may result in the users being presented with a blank screen.
Process Duplicates: Confirms that the server should repeat recognition events, even when the server recognizes a screen multiple times in succession.
ViewPort Locked at position: Sets the upper left corner of the screen to a desired row and column when displaying this screen. The telnet host option to follow the cursor will not be applied to a locked viewport on a reformatted screen.
Allow Reformat Upscaling: Allows the screen size to adjust for screens larger than the minimum size, but less than the full emulation screen which is controlled by the option Upscale Fullscreen.
Inactivity Timeout: Sets an timer to end the session of there is no input from the user within the time specified. This will apply the inactivity script from the emulation properties of the telnet host entry if one exists. Once a screen is recognized, you can capture variables, apply functions, input automatic responses, apply modifications to incoming input and/or reformat the screen. Each of these options is given a tab for the configuration of those options within this recognition instance.
Capture and Set Variables
Once a screen is recognized by the StayLinked Server, various features can be implemented. The first feature available are screen variables. These are values specific to the screen or program or captured from the emulation screen. These values can be used by other features.
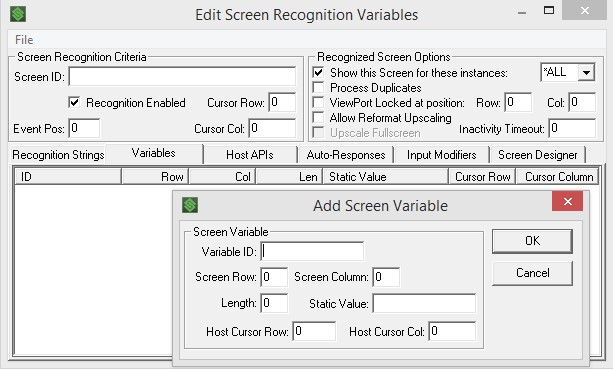
Variables are given an id to be used in the other dialogues and are provided a static value if desired until a dynamic value can be acquired. The dynamic value will be pulled from the captured screen based on the position and length. A typical use would be the capture of usernames for the connections list. Recalling a variable is accomplished by entering the variable name within a set of percentage symbols. For example, the variable name user could be recalling in the designer or APIs using the value %user%.
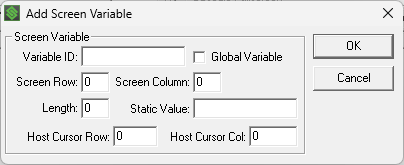
Creating a global variable is done by placing a $ symbol at the end of the variable name. This allows the variable to be used on screens other than the one in which it was captured. These variables will have the static value until replaced with a value retrieved during the session.
Starting in v16.1, a checkbox is available for global variables. Be sure to select this option only when you need the variable value to remain available on subsequent screens. You may also need to clear the variable value when you no longer need it retained from the prior event.
Note that Server version 15.1 build 208 and newer server versions will update variables as they change on a recognized screen. This allows for variables of user input locations to be captured without having to create multiple screen recognition events.
Host Application Programming Interfaces (APIs)
Host APIs provide a wide range of functions. They can be included in any application screen by adjusting the application, or added to recognized screens without adjustment of the hosted application. Complete details of the available APIs and their options are available in the StayLinked Host API programming guide. There are a few APIs that will not appear in screen recognition, and are only available as a host presentation event.
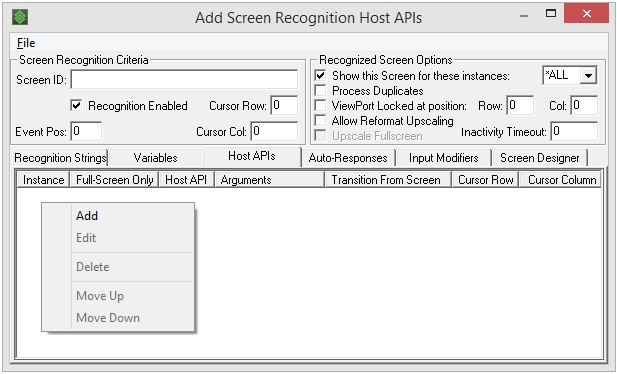
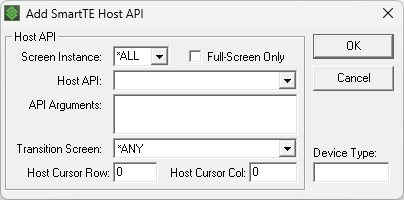
In addition to the conditions and argument requirements for the host API, this dialogue also allows for row and column position of the cursor, specific transition screens and a requirement for full screen updates. The option for full screen only means that the presentation event must be a full screen event to trigger the API feature. Transition screen prevents the event from triggering unless the user came from a specific previous screen. The cursor position means that the API will only trigger when the host has a specific cursor position. By example, you might have an API the presents the on-screen keyboard, but only triggers when the user has navigated to the quantity field on the host application screen.
Device Type filters in the lower-right will not appear for any server older than v15.4 when this option was introduced. This filter allows the API to be applied only to specific device types, as the are defined on the Client similar to Keyboard Maps and Device Group usage.
The screen instance dialogue allows processing of the API when special conditions are met. While most screens will use the *All value for instance, selecting a value limits the number of times the API takes place based on how many times the screen has been presented by the telnet host in the same manner that other screen instance options work. By example, this might be used with the terminate session API to end the StayLinked session on the second time the sign-on screen is presented. This would free up the license for use by other devices when users log out at the end of a shift. The first instance needs to ignore the API, or users would never be able to sign on because the session would be automatically terminated. These options will operate in the manner the API is described in the Host API guide.
v15.1 build 208 and newer servers will automatically update the username in the connections list and usage tracking (if enabled) if users are connecting to an SSH host with keyboard authentication. This version also introduces the screen instance of *exit, making the event take place as the screen event changes and this recognition event is ended.
v15.4 and newer servers support a new API to play a custom sound file. Using this API will instruct v15.4 and newer clients to play an audio file from the WAV folder of the client of the same name. You must distribute this custom sound file to devices.
The second feature is to designate a custom *API number that can be called by other elements that support tap scripts or recognition scripts. There are a possible 10 custom *APIs available per screen recognition event. For example, creating a custom *API that runs the calculator would look like so:
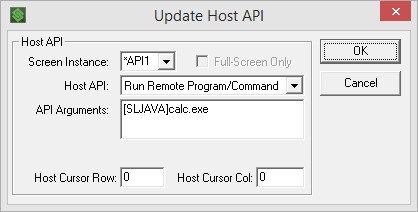
Note – Using a device type in square brackets can limit the devices that will operate the *API. You can also create multiple instances of the same *API entry with different device types, allowing for the *API to behave differently on different devices.

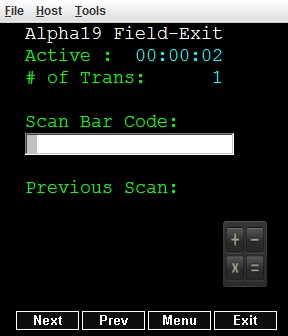
Once this has been added as a tap script, tapping this ‘calc.jpg’ graphic would run the remote command on the device as calc.exe, which typically runs the windows calculator.
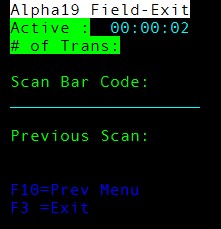
Once implemented using the screen designer it might look something like what’s been displayed on the reformatted screen on the right. This example uses an image, but any text or label could perform the same feature.
Here you can see the original screen on the left with the reformatted screen on the right.
v16.2 and newer Administrator installations will show the device type filters as a column under the Host APIs tab. This version now offers the instance option of *NONE for cases where the API should be disabled.
When using reformatting, the host cursor positions are not the position on the reformatted screen, but are the location of the customer as it is on the host screen without any reformatting. Using a session screen dump from the connections list may help determine that actual cursor position.
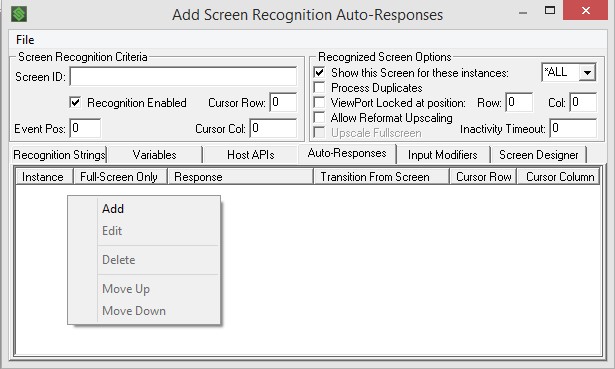
Automatic Responses
Automated responses are commonly used to respond to screens that don’t need to be presented to the user. Using this feature, you can automatically provide predictable input instead of having the user enter more information increasing the chances of input errors. Automated responses are commonly used to respond to screens that don’t need to be presented to the user. Using this feature, you can automatically provide predictable input instead of having the user enter more information increasing the chances of input errors.
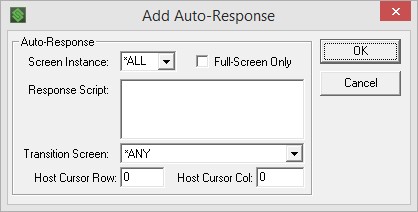
Entering an auto-response relies on standard mnemonics. These appear in several places in the StayLinked solution, most commonly in the keyboard maps. Scripts can be entered, and if variables are captured on other recognized screens you would see a pulldown in the right border with the available variables. This allows the feature to bypass unnecessary screens or automatically enter values that have already been displayed and captured as a variable.
By example, this feature might be used to provide sign-on credentials if the users share a common user profile. In this case, the script might look something like this:
Username[enter][delay]password[enter]
Input Modifiers
In many cases, the recognized screen may be created in order to make input adjustments that are specific to that screen. This might be used to adjust barcode input that is only modified on a particular screen or field, preventing the use of global adjustments. You might also need to skip a field, and this might be completed by adjusting a scan suffix with an extra [enter] or [tab], causing the application to skip the next input entry.
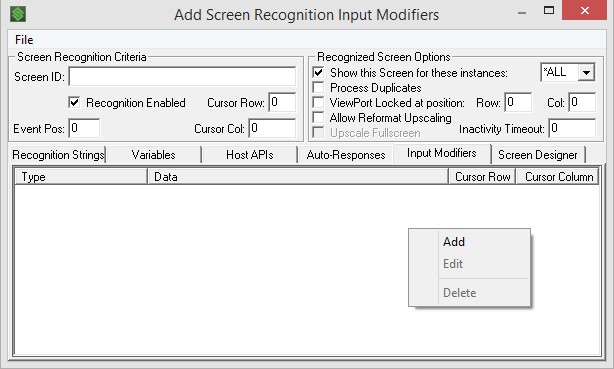
Input modifiers can be included in several forms:
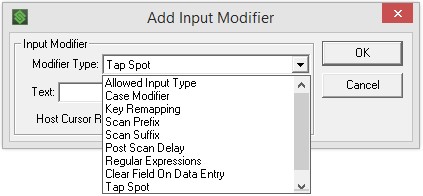
Allowed Input Type: This feature allows you to set the screen to keyboard, scan or voice only input. Users attempting to provide input of different types will be given an error beep for each rejected input.
Case Modifier: Set all input to upper or lower case, or set the input to original to allow the host to set the case-sensitivity options.
Key Remapping: This option allows you to make keyboard map adjustments that are specific to the recognized screen.
Scan Prefix: Data to include at the beginning of every barcode scan.
Scan Suffix: Data to include at the end of every barcode scan.
Post Scan Delay: Set a timer before the next input is processed after a scan input. This can be particularly useful if heavy processing takes place between screens and users can provide the next input before the last event has completed.
Regular Expression Processing: Adjust barcode data using a regular expression. These are very extension features that allow a wide range of barcode adjustments. More details are included in the Regular Expression guide in this knowledge base site.
Clear Field on Data Entry: removes all data in a pre-populated field when new input is provided by the user. This helps prevent existing data from being partially included in a new input.
Tap Spots: Add functions to text presented to the screen. This is only applied to text that is part of an original screen and will not affect text added to a reformatted screen. Reformatting text can be configured with a ‘constant text script’ to provide this feature.
Screen Designer
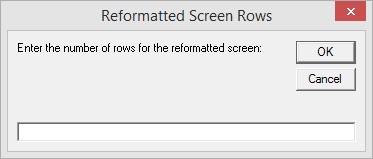
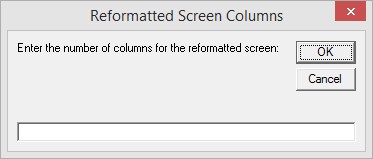
The Screen Designer tab provides a list of reformatted screens based on the display size. Screen size is a critical part of reformatting, since screens are most commonly reformatted in order to reduce the display area to fit handheld screen sizes. Right click in the list box to create a new screen size for reformatting. Please note that the “On-Screen Indicator Area” or OIA will consume a display row if configured for classic mode. Add one row to your dimensions if you plan to display the OIA.
Devices using row or column dimensions that are different than the remapped screens will be presented with the standard screen, not the reformatted one. This can be extended using the ‘reformat upscaling’ described earlier in this section. Starting with a copy of an existing reformat will prompt for new screen dimensions, but copies can only be increased to larger display sizes.
When right clicking on an existing screen, a context menu appears that offers several options. These include standard choices like add, edit and delete as well as opening the screen designer and making a copy.
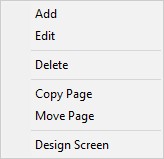
Please note that screens only be copied with equal or larger screen dimensions. Smaller sizes must be created to scratch. This means the best practice is to create the smallest version of any screen first, which can then be copied to larger sizes that take advantage of larger screen areas.
When a screen is copied (or created) with the same size as an existing screen, it will become a new page number. These pages can be navigated using any button, tap spot, or feature that can invoke the mnemonics for [device-left], [device-right], or [showpage##]. Designer screen pages can be a solution for breaking lots of content into smaller pieces for users.
When creating or editing an entry, you will be presented with a display of the screen map as it normally appears as well as a smaller area representing the reformatted space. There are several different elements of adding content to the new display space, such as; copy screen text (copy block), place input fields, add new original text (constants), add graphical elements (Label, Button and Image). These objects are described in more detail in the next section.

You can click and ‘rubber-band’ to highlight and select text, or right click on fields to add them to your reformatted screen. Each element selected from the original screen will present a dialogue. Most dialogues will have the origin or destination coordinates blank. Once the dialogue is completed, the update will appear in the preview window of the reformatted screen and in the list of elements along then left pane.
Starting with server version 15.5, selecting an area in the original screen map will present the option for a Graphical Menu Block. The Reformatting Copy Block offers a direct copy of text in telnet style as it appears in the host application.
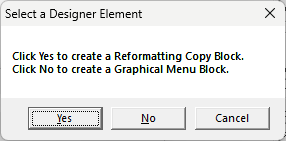
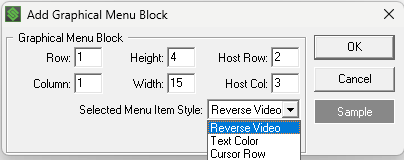
This menu block differs from the copy block in that it has several graphical options as well as cursor and reverse video support for host systems that offer highlighting for the active selection option. Clicking the Sample button offers several graphical options similar to how a graphical label or button creates.
Right clicking in the reformatted screen provides a list of items that can be directly added, such as graphical elements and VT input locations.
Objects can be dragged to a new location in the preview window, but cannot be placed in a way that causes any overlap. Each element must have designated space for the display or the entire item.
If no graphical elements are added to a screen, it can be displayed on both SmartTE and standard TE devices. As soon as graphical elements are added, devices that are not using a SmartTE client will not properly display that item. In a mixed environment, keeping separate host entries may be desired.
The left pane allows you to double click on each element to copy or make adjustments. Note that the selected element is highlighted on both screens and on the list in the left panel.
You can also right click on a screen and select ‘remember location’ to set your desired row and column, or view the bottom of the window for details on your mouse’s current screen position.
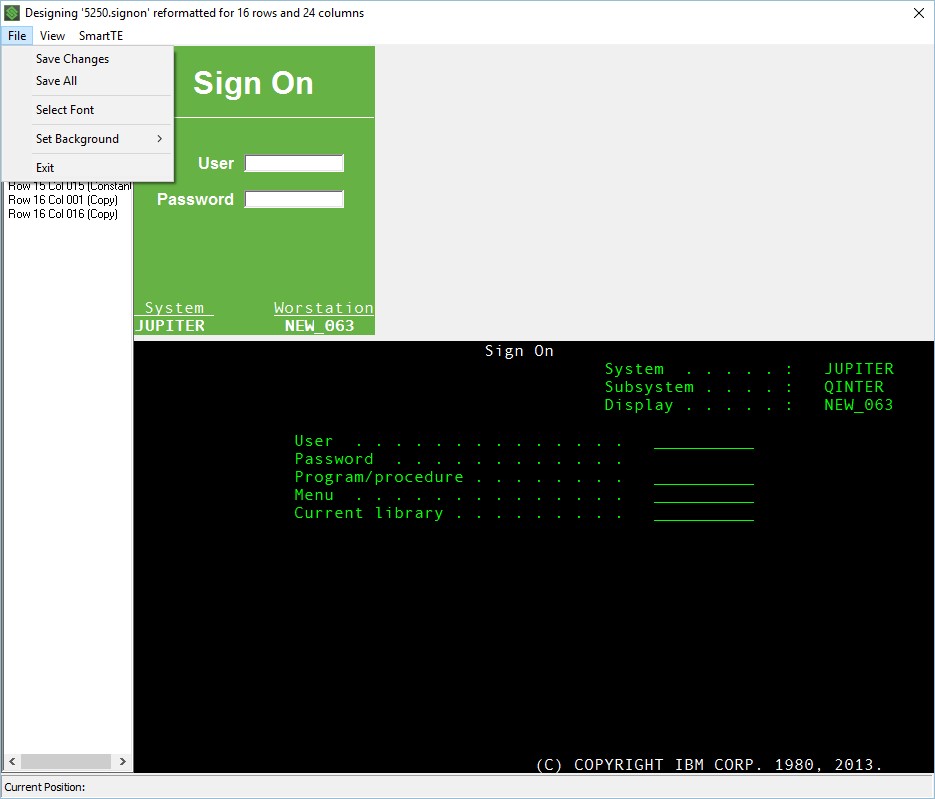
The options available from the File Menu include several standard items, such as Save Changes and Exit. There are also a few special options, listed below.
Save All – This item allows you to save all changes back to the main Administrator screen. This item may need to be selected twice, depending on the types of changes that have been made since the last save.
Select Font – Setting the font in the designed is
important to make sure that graphical labels match the fonts that have been
selected for the display on your devices. Both the device and designer will use
the OS default font unless configured for a specific value.
Set Background – This option allows for a static fixed background color or image. If an image is selected, you can select a custom color using the color picker below the cancel button.
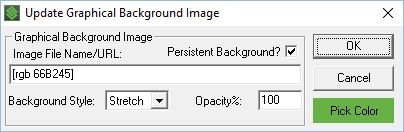
Persistent Background will make this background image the new background for all subsequent screens until the client receives a new background image from another recognized screen or starts a new session.
Background Styles are available as Center, Stretch and Tiled. This determines how the client will make the image fit on the device screen.
Opacity allows the client to set a transparency of the background image. This can work with the background colors to create a faint image or watermark.
The options from the View menu include:
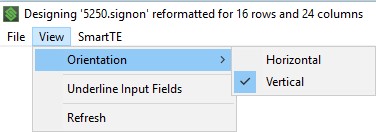
Orientation – This defaults to vertical with the reformatted and original screen set vertically top and bottom. Setting the view to horizontal will set the reformatting window to left and right orientation.
Underline Input Fields – Will help identify input locations by showing underlines.
Refresh – This will reload the reformatted screen designer is cases where it may have trouble accessing content from the image library or have scale issues.
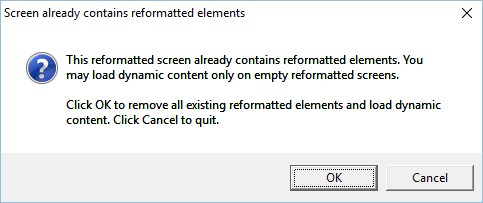
The SmartTE menu contains only one option, Reload Dynamic Content. This allows your tap spot collection rules to be applied to the original screen and display as elements in the new reformatted screen. This should not be done when reformatted content has already been added to the screen. Trying to reload dynamic content in a reformatted screen will present the following warning:
Share the post "Configuration Dialogues for Screen Recognition"